1968 Whaler
November 2017

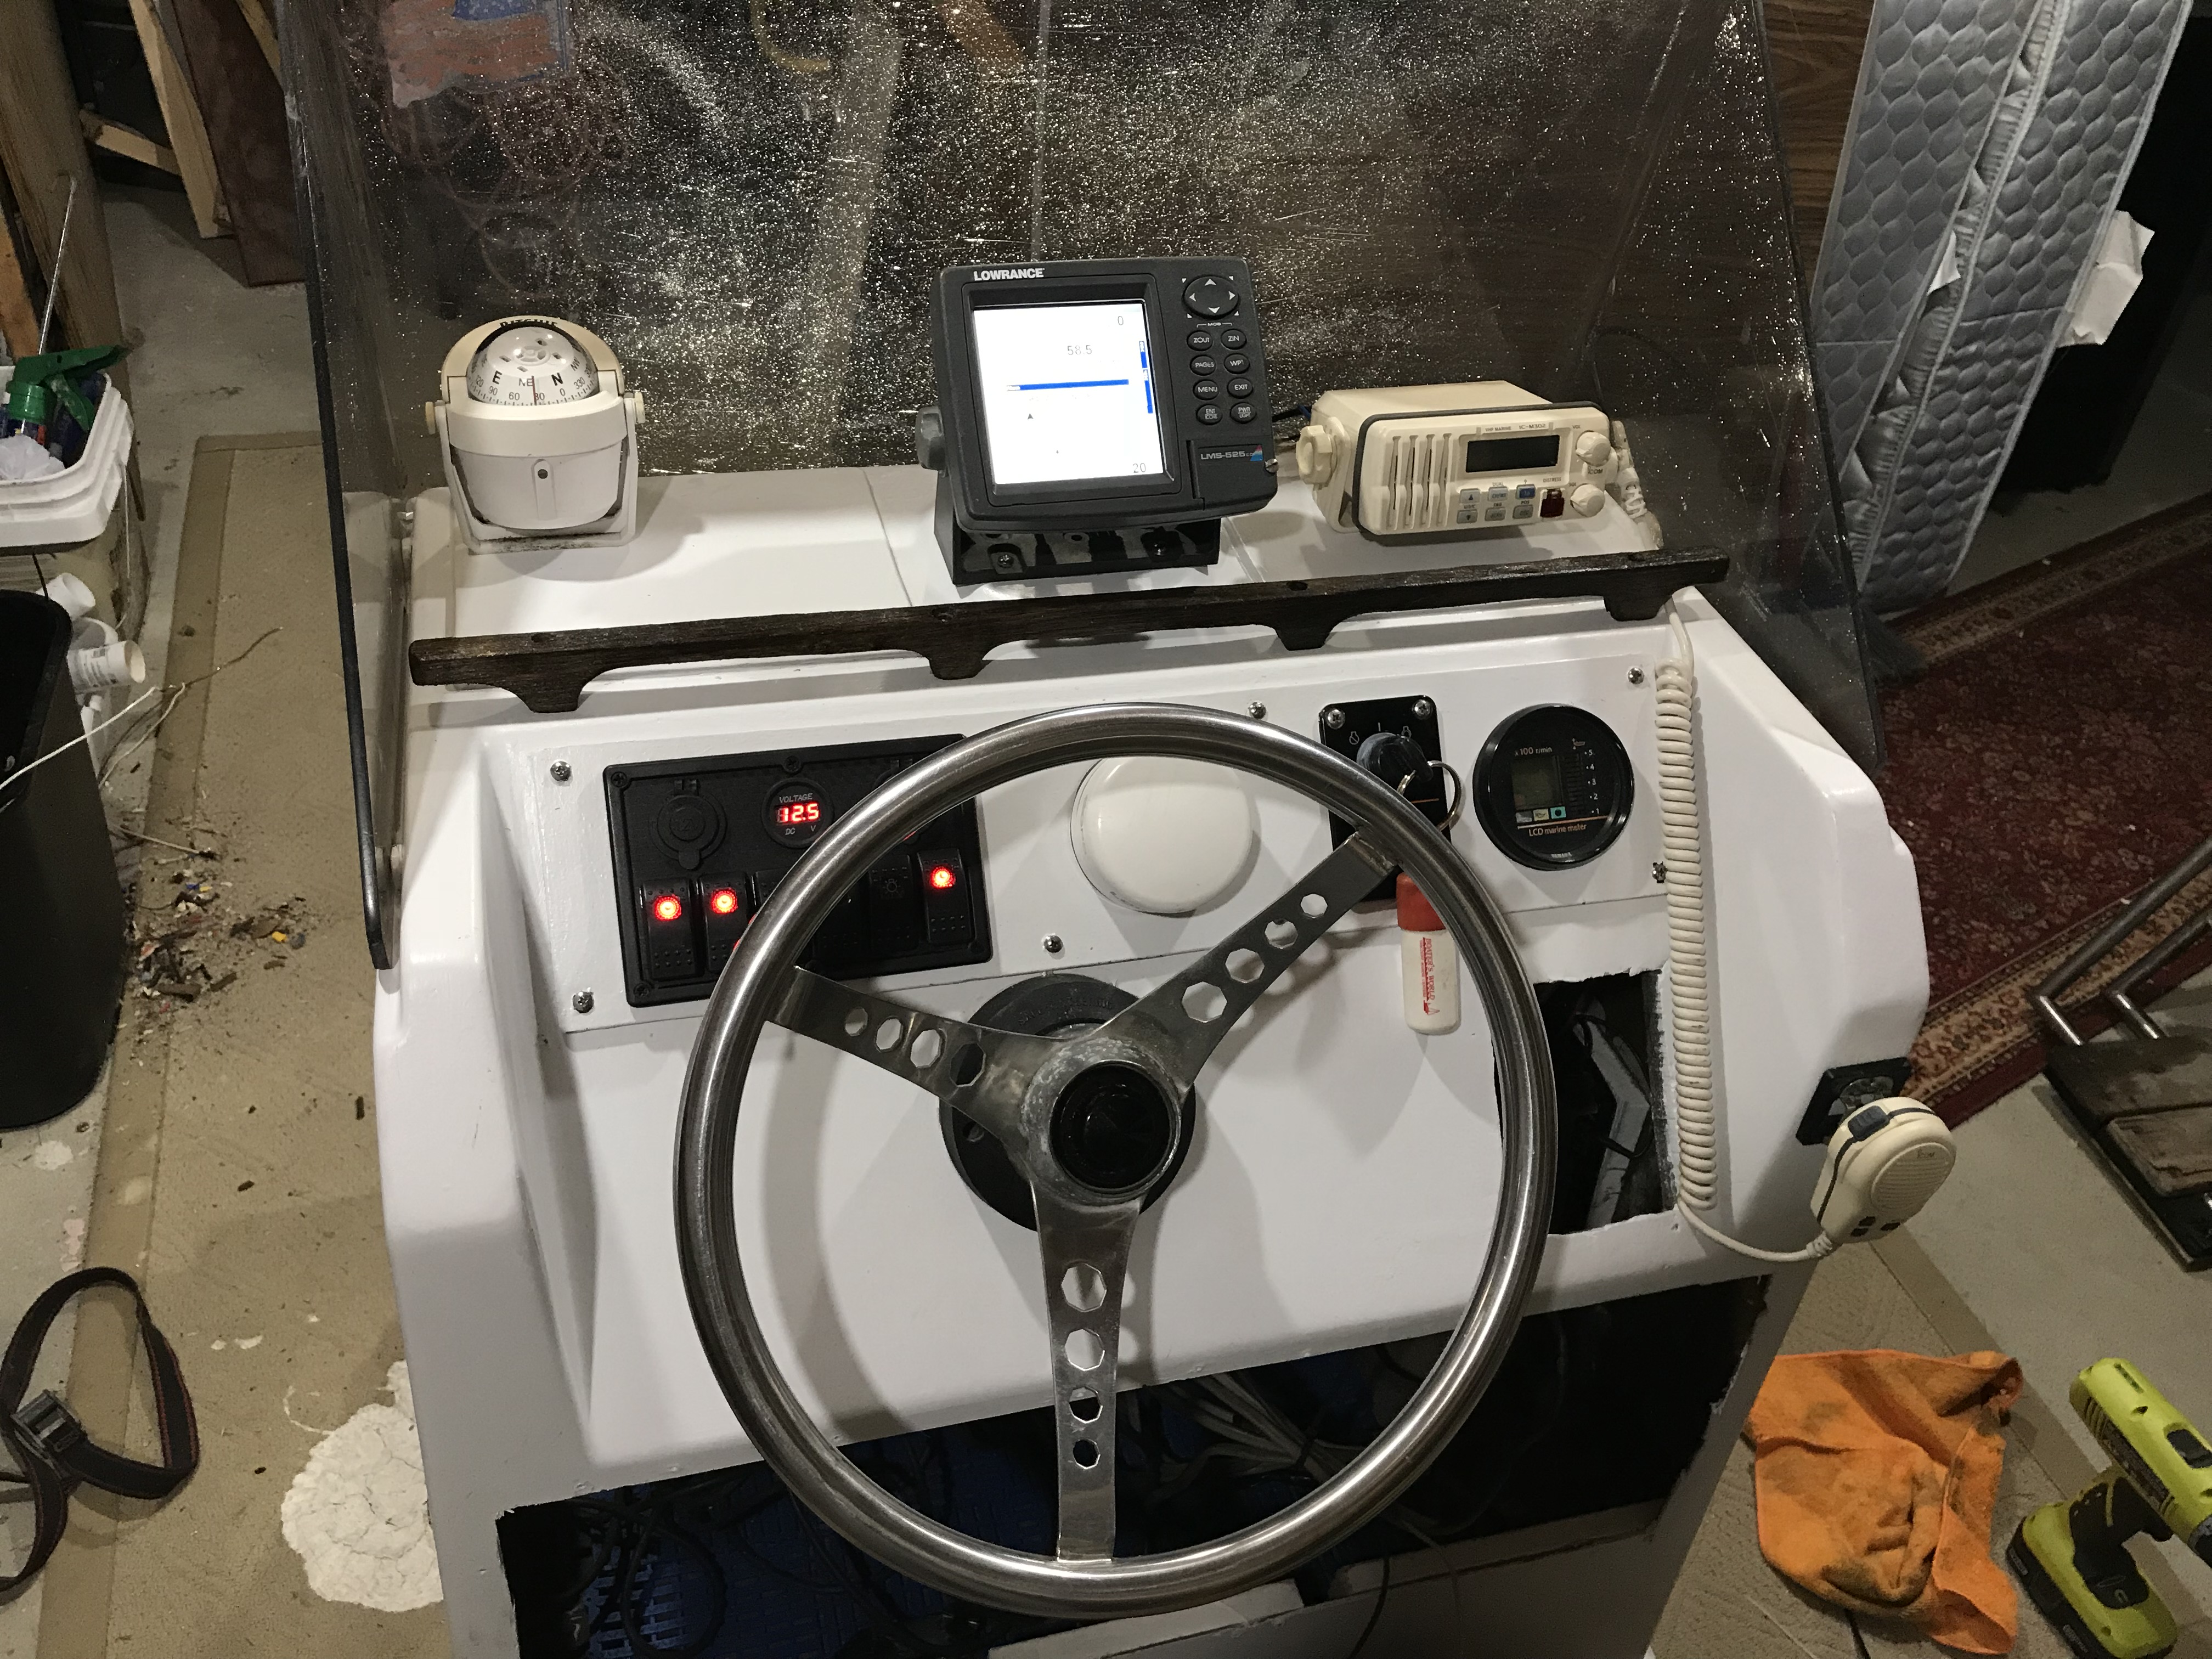
01: Console Progress
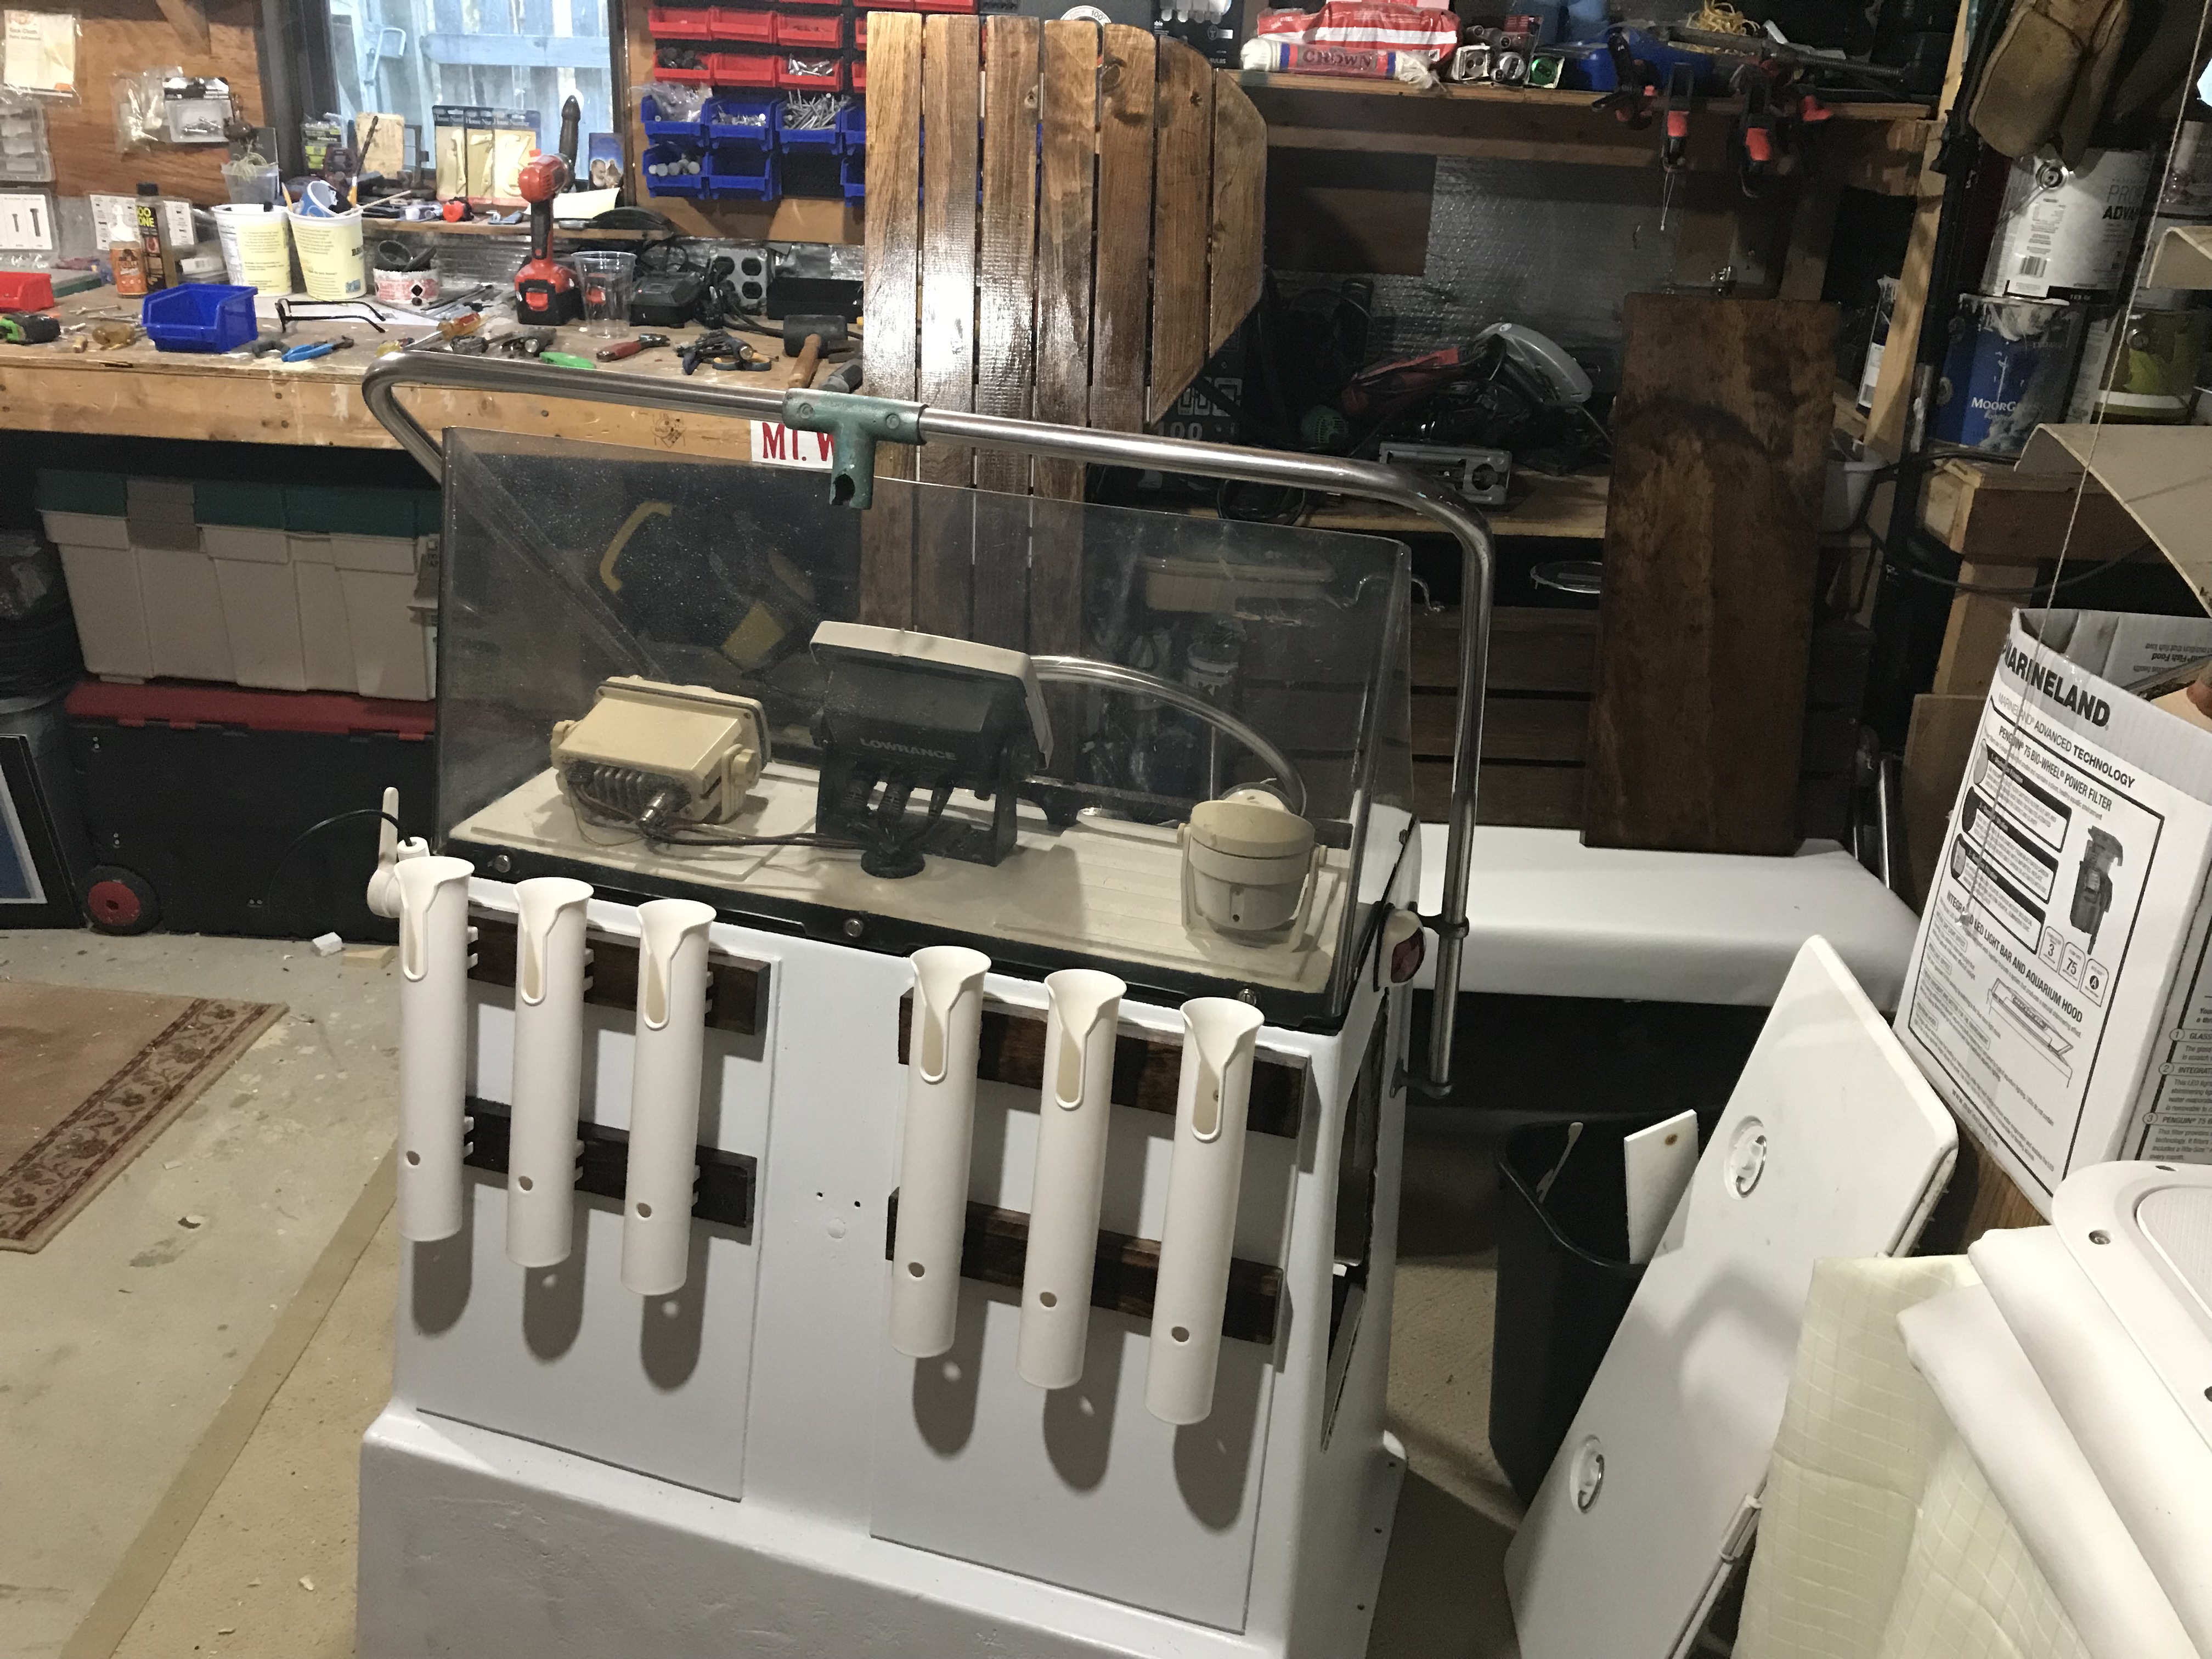
Couple of coats of topside paint. Could have been a bit smoother, but it was my first run with topside painting over existing gelcoat. The console was pretty beat up. Lots of cracks, holes, and dings. You literally have to inspect it to see any flaws. May have gone a bit heavy on coats… maybe…lesson learned. Looks way better than it did prior, and I’m my own worst critic. Instruments fitted and installed in console. Prewired everything and checked connections already. All that’s left to do is connect main wires from battery to bus panel, plug/connect ignition, tach wires, etc… The botton right hole is for the binnacle. That gets installed last – with the steering cable, once console is on boat. Top center hole is for GPS and radio wiring. Hole gets covered and wires get secured with a 1″ Rigging Grommet. All component panels got new gaskets before installing into console.
02: Wiring Challenge
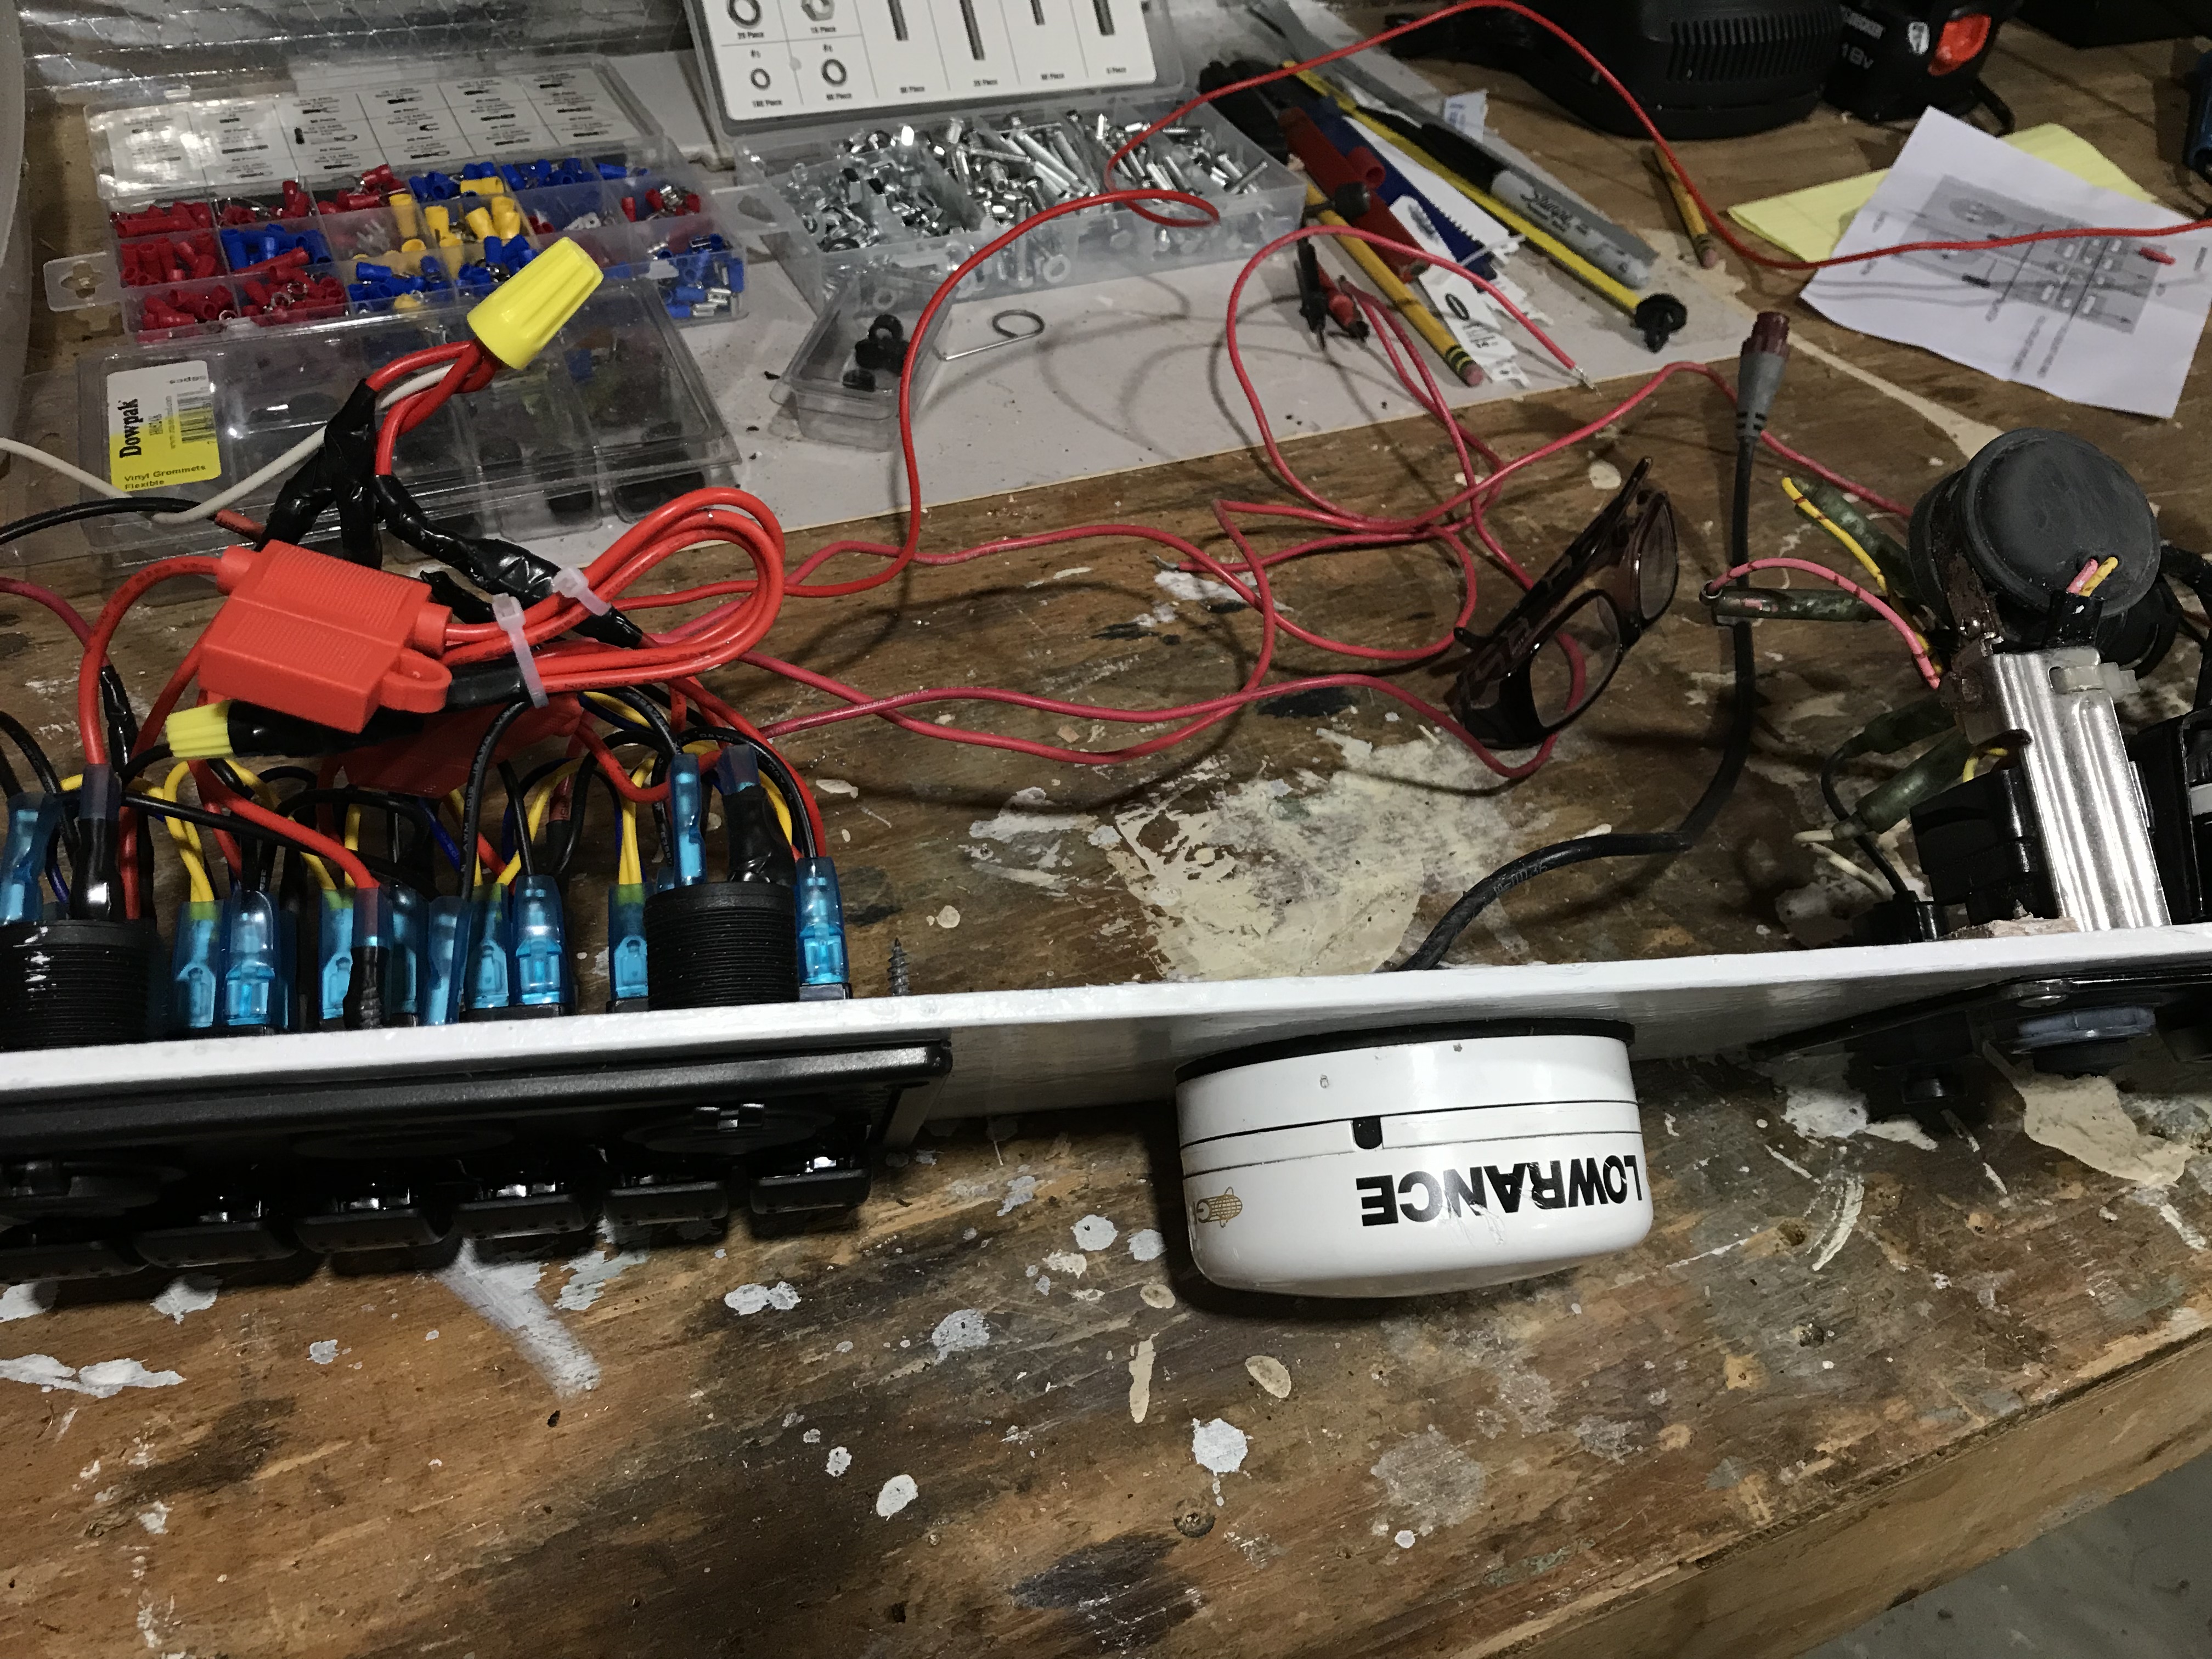
Toggle switch panel came pre-wired. Had to reroute a few connections and connect the USB, voltage meter and 12v to its own toggle preventing the LED lights they use from draining the battery when not in use. Looks good, works great.

03: Bow Progress
Lots of sanding, filling here. Just about done on bow section. I used straight up bondo on some sections – very, very thin layer. Quite sure I may get feedback that it will absorb water and crack once flexed. I kept the layers very thin. A coat of primer and one or two coats of topside paint should create enough layers to protect and take the flex. The gelcoat on the deck was in pretty good shape, other than the multitude of holes. Those were repaired with epoxy resin or fiberglass then sanded flat.
04: Original Reversible Pilot Seat
What to do? Located all the parts from the original 1968 RPS. Chrome is fine and everything works, but needs a complete do-over. The wooden seat back is really nice, a bit of sanding and refinishing would make it look sweet. Would have to make or purchase a new cushion, rebuild seat platform, etc… more work… it goes on the back burner for a while…it would look nice.


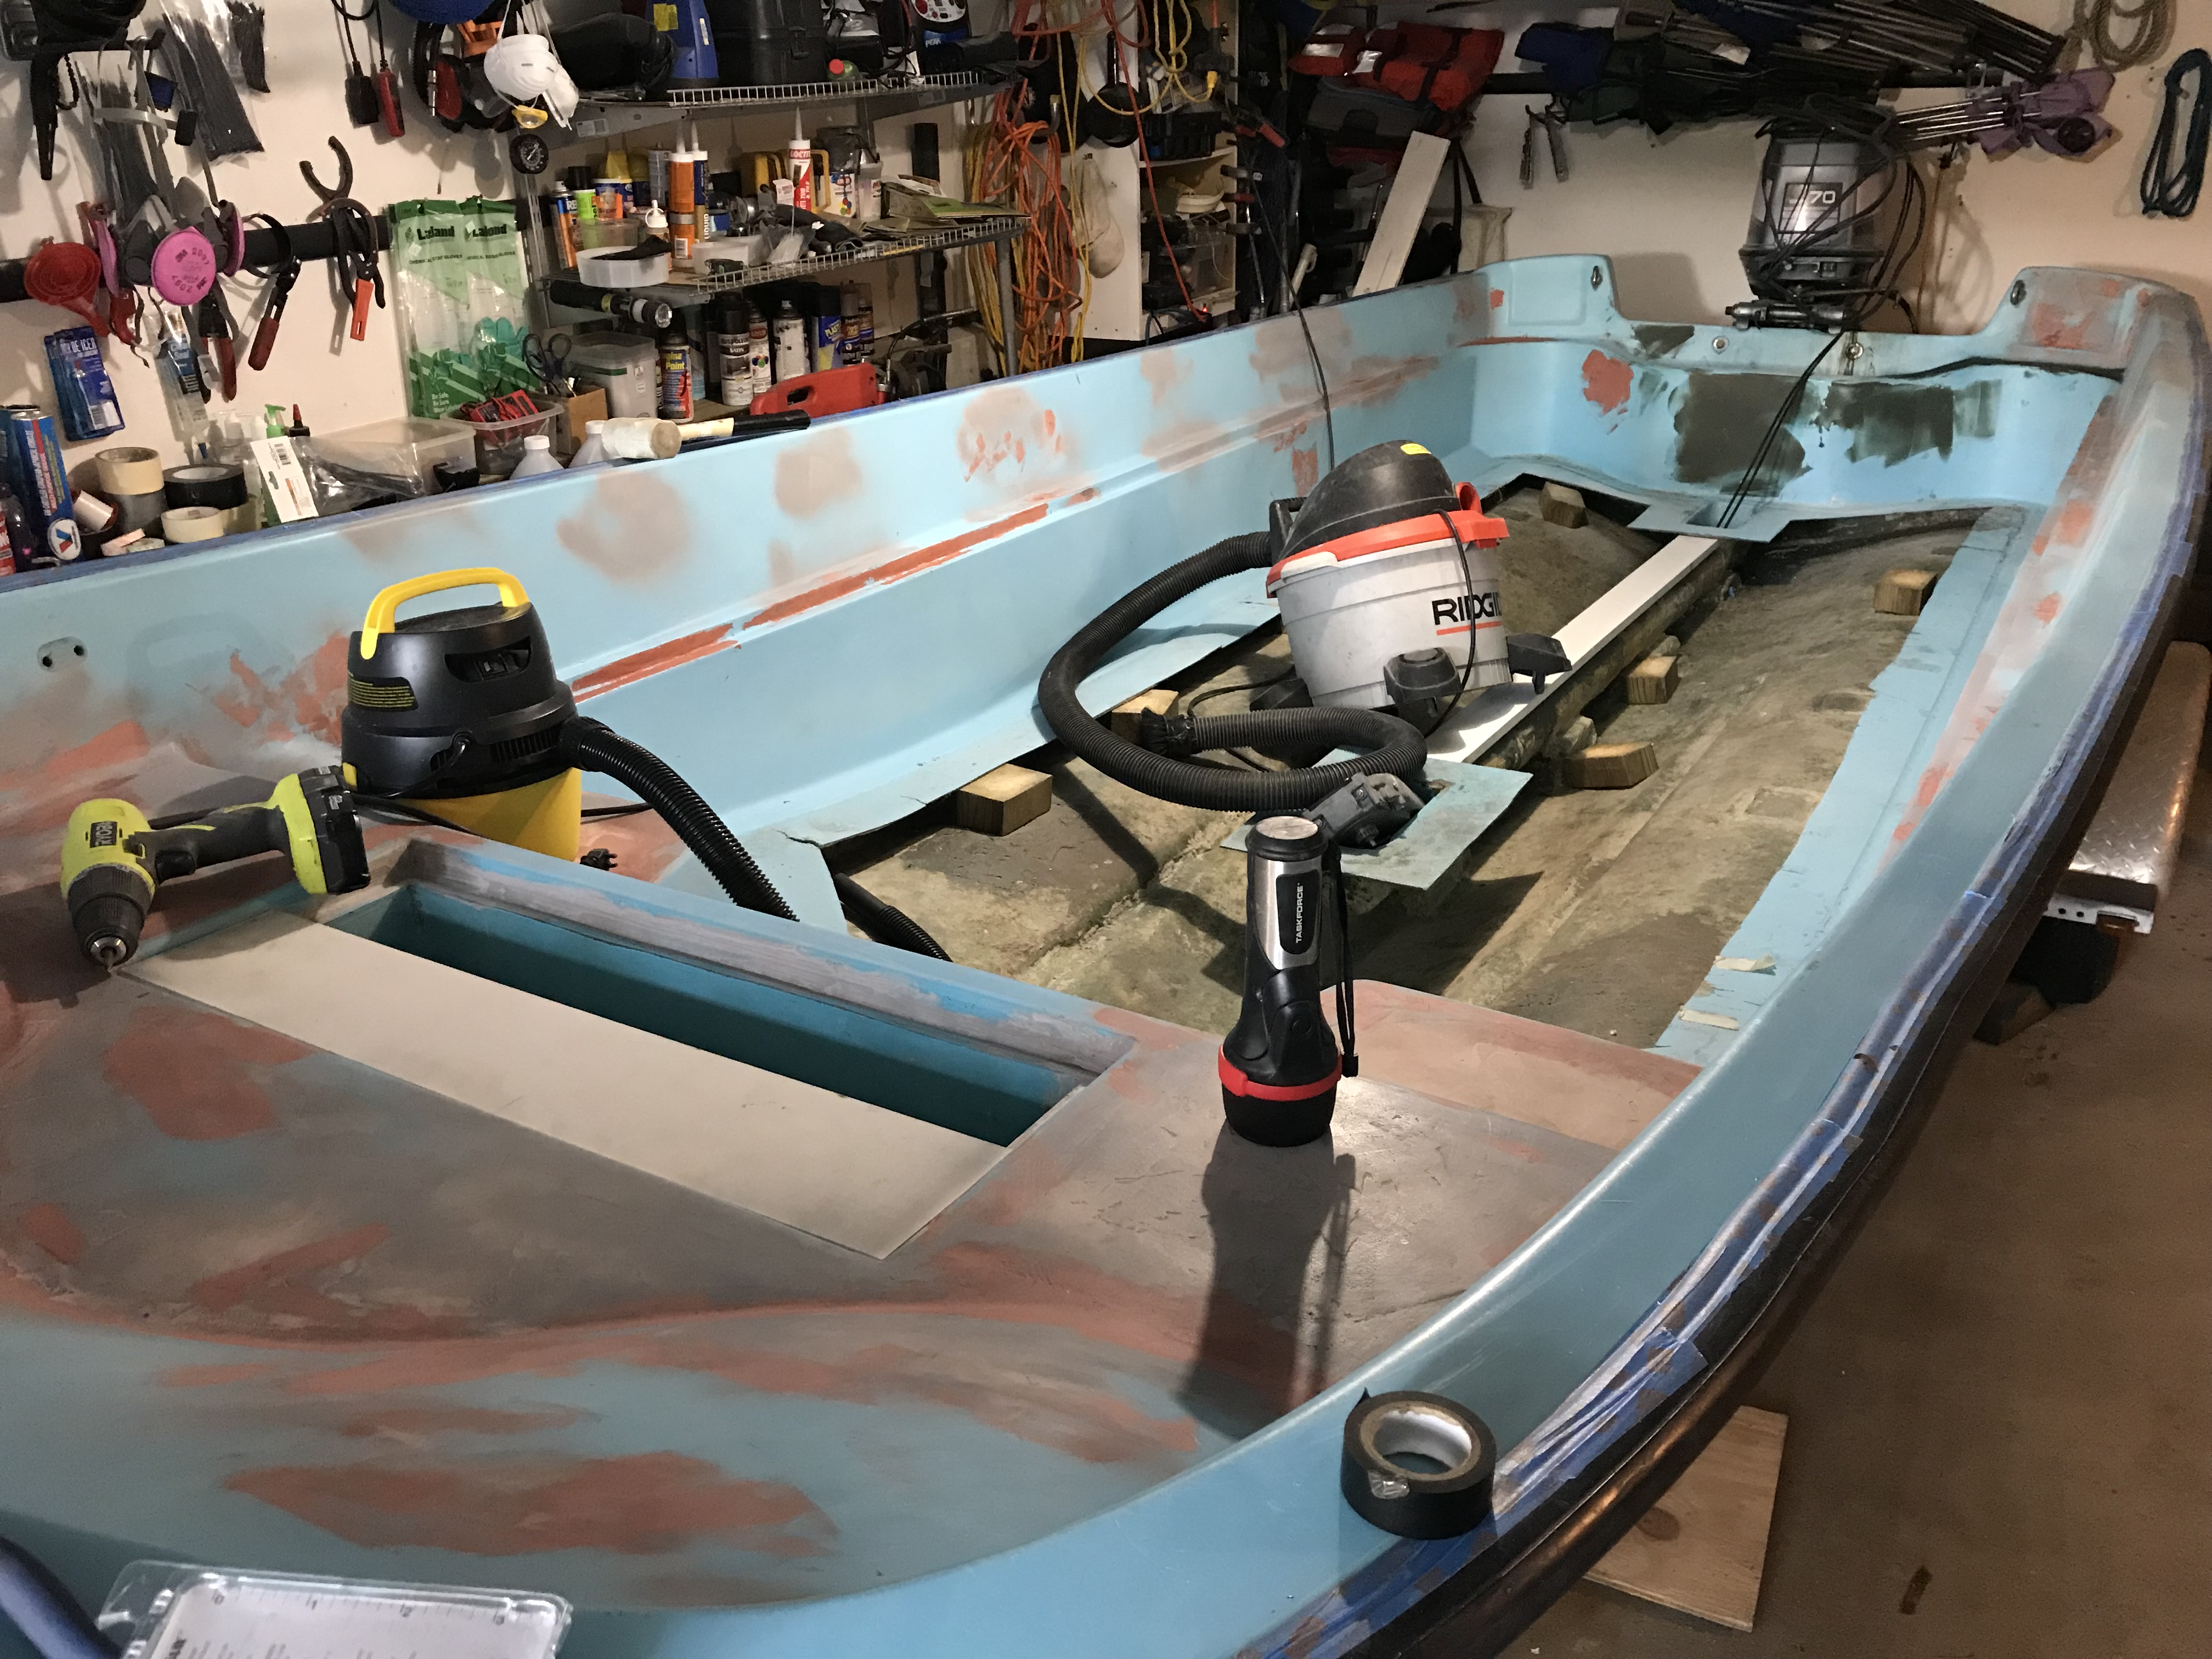
05: Stern Progress
Removed a kicker motor bracket, plugged and glassed the holes over, in doing so the transom condition got answered – it’s rock solid! dry as a bone. I left the engine on not knowing the condition of the transom, now that I know, I’m going to leave it as is. It’s torqued and sealed, not messing with that! Going to be a bit harder to paint around… I’ll deal with it. Did some general sanding and filling. Gelcoat was solid, a few spider cracks, just cosmetic stuff. Waiting to dry, then sand and fill again.
06: Overall Deck Progress
Pleased with the overall progress thus far. Making that first cut in the deck feels like ages ago. The long winter months are perfect for this once saturated hull. Hull probably hasn’t been this dry in 20 years. Cleaning with a degreaser after each fill and sand, keeping the job site as clean as possible and the contaminants to a minimum. The time is also allowing for more in-depth research on re-foaming techniques, etc… Probably going to start doing some hull repairs next, then jump back to the console, etc… getting antsy to maybe put on a topside primer in a month or so.
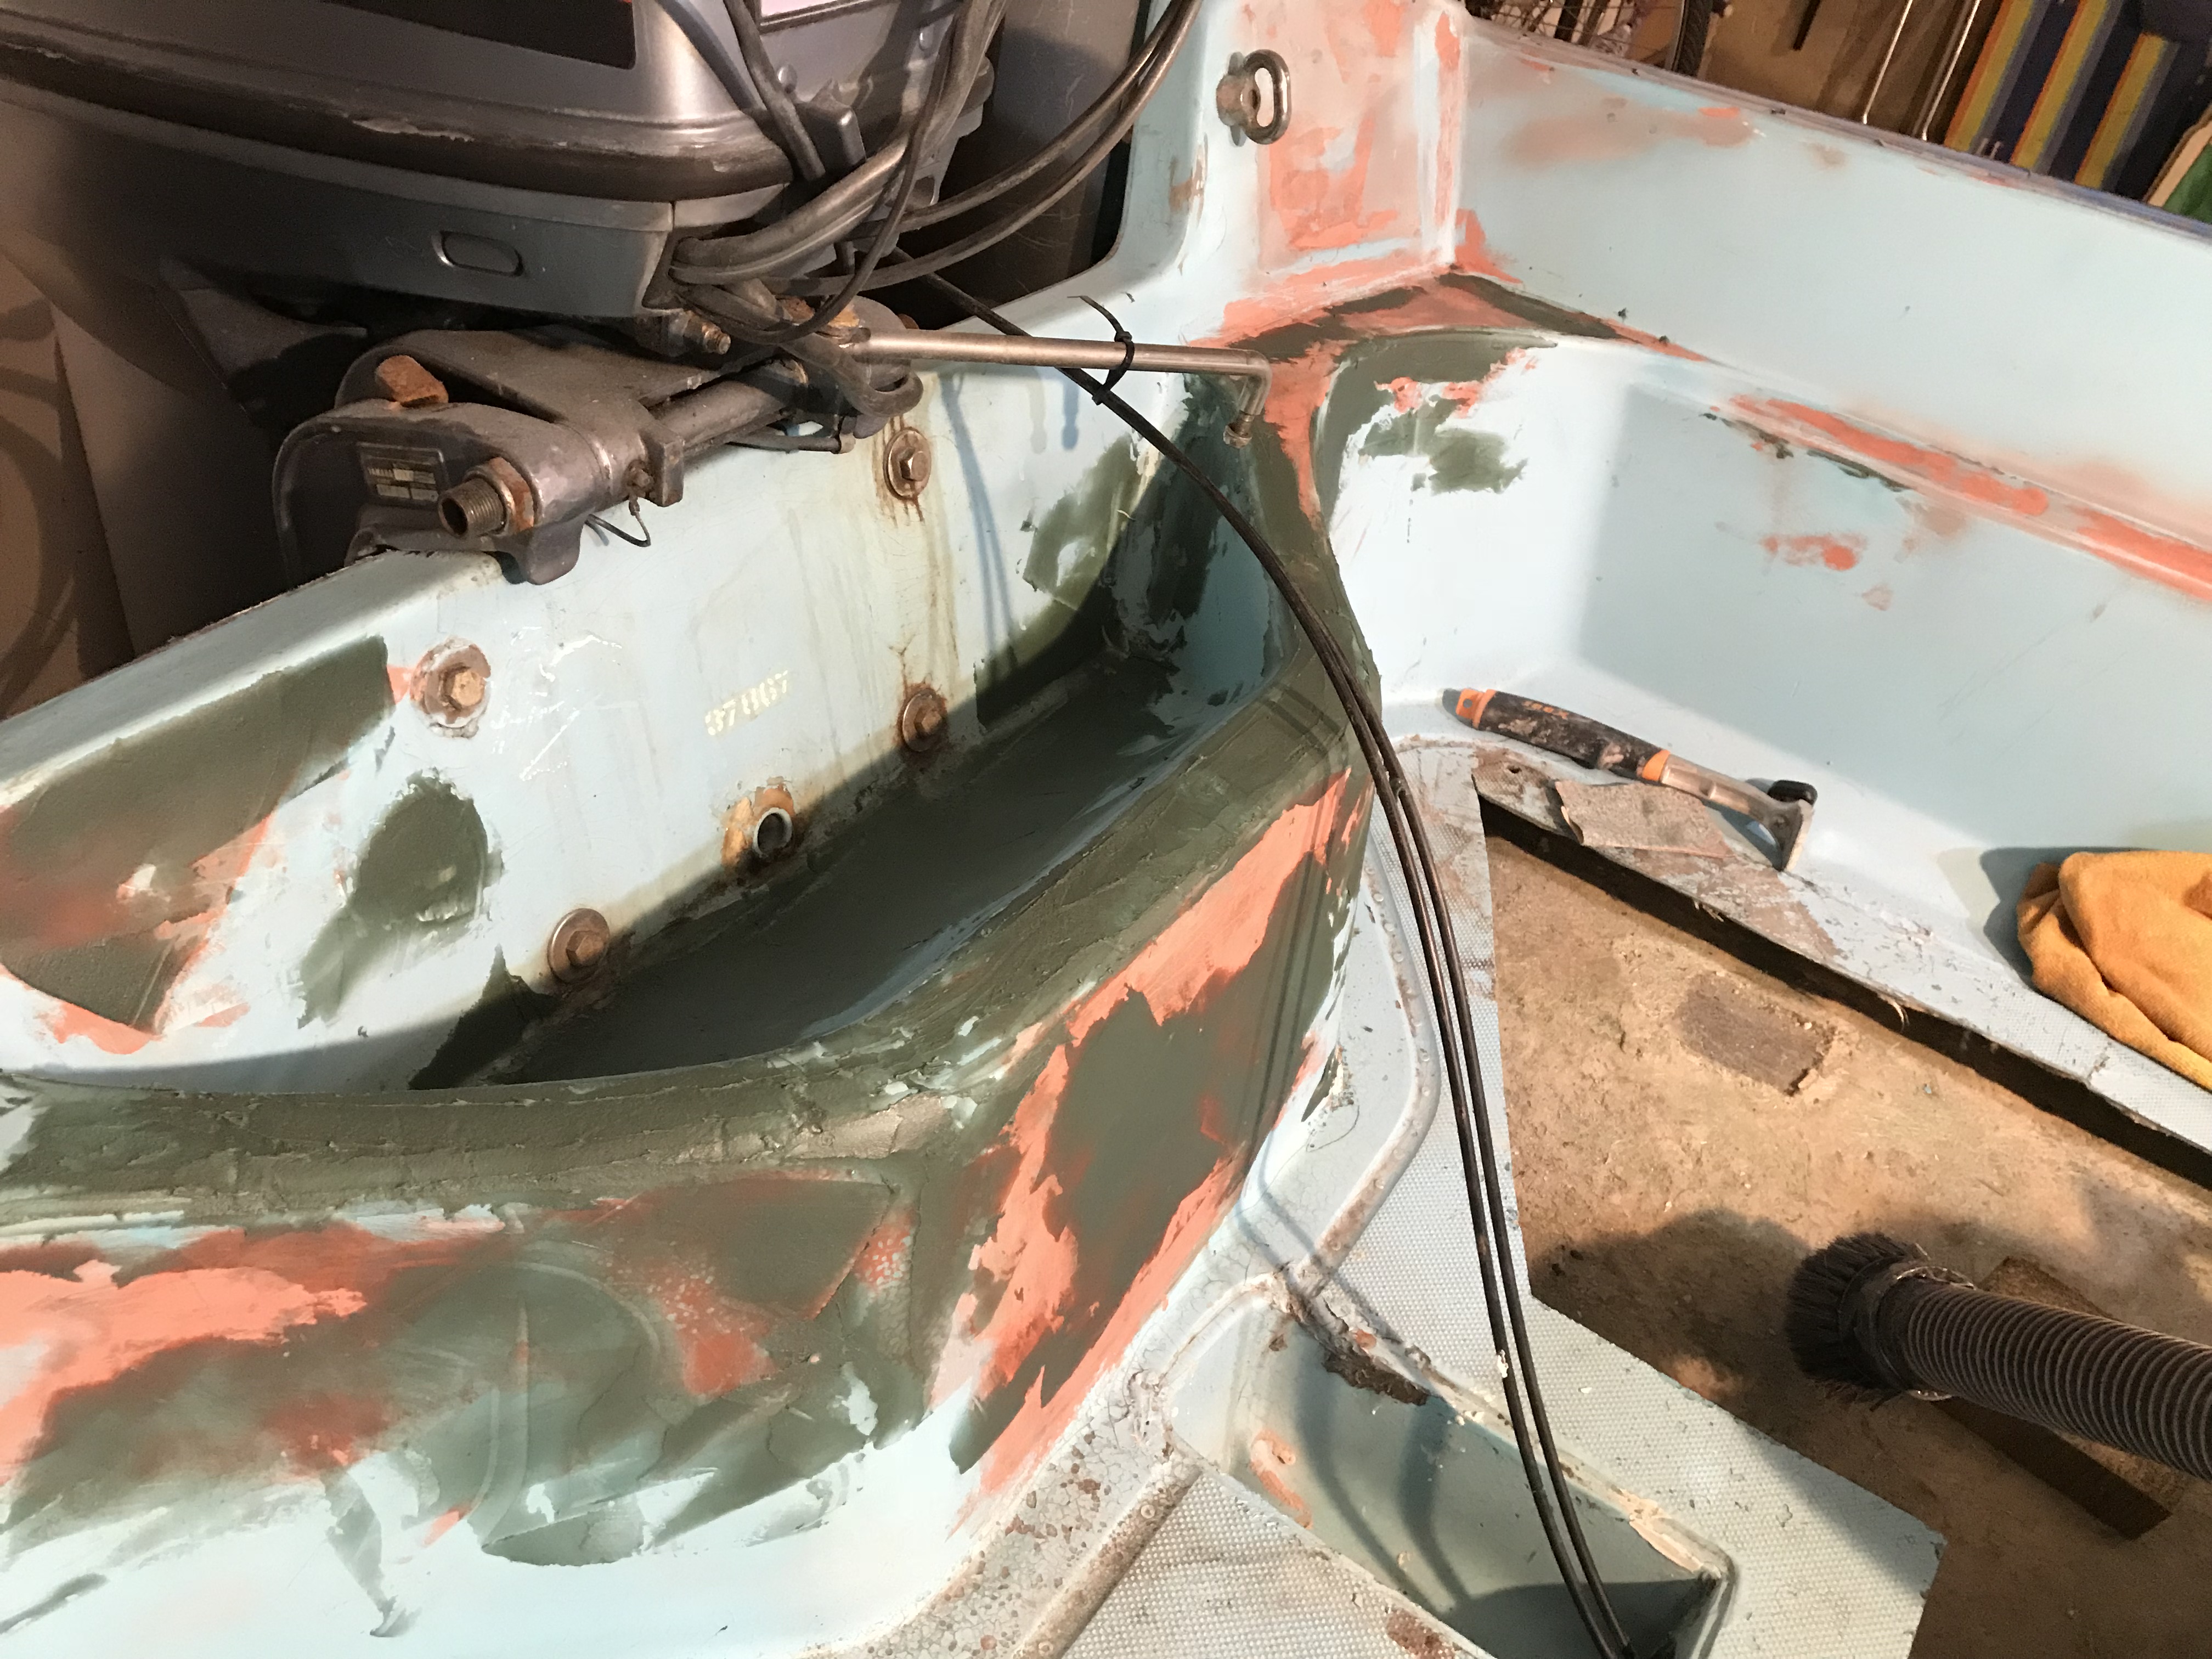
07: More Than Met The Eye
After a bit of work back here, the spider cracks and gelcoat wear became more apparent. Used a Dremel to open up the larger cracks. First coat of Glass resin to bring back the structure. Back to the console and bench.
08: Console Wired
Wired and tested the switches. Works great.
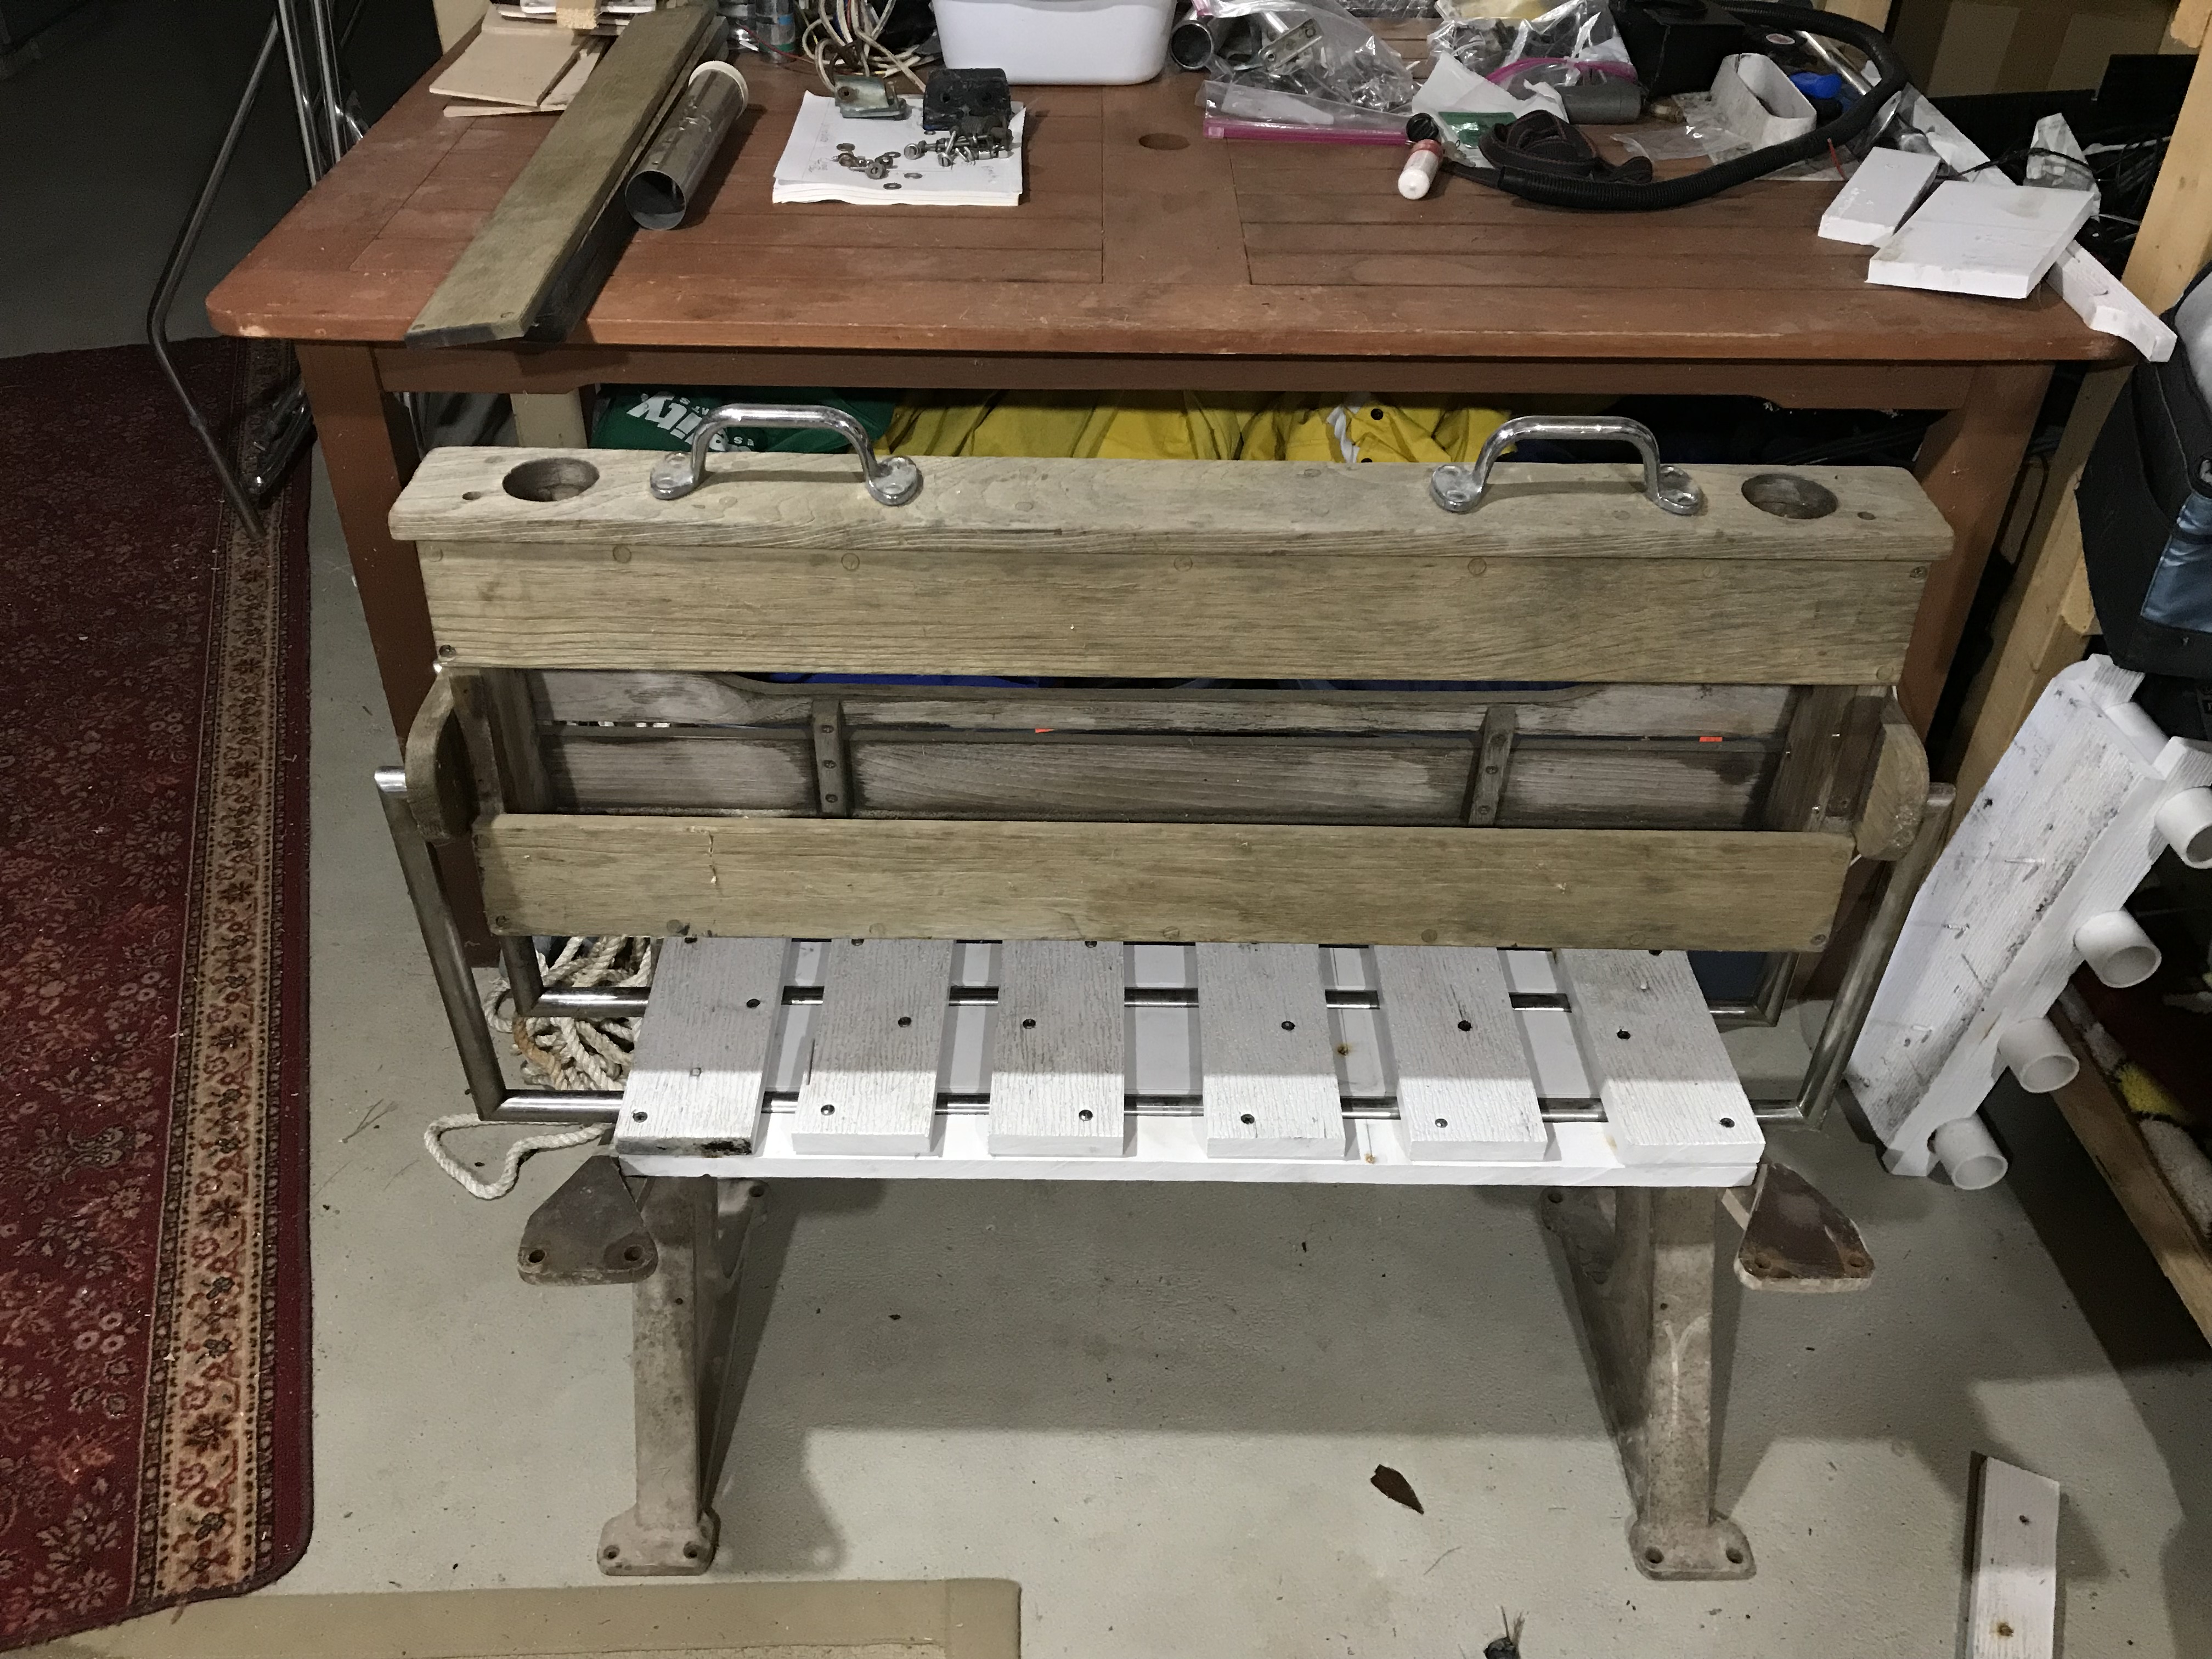
09: RPS Progress
Not having a lot to go by other than some rotted sections from original seat, I’ve winged it a bit. Still have to sand, glue, tighten, paint the z-braces, and varnish, but it’s back from the scrap heap ready to live another 5o years.
10: Console Finesse
Buffed out the plexi-windshield (best I could). Antenna mounted – finish wiring that later, and some chrome hardware… Not that I don’t want to buy all new chrome, windshield, cushions, etc… it would look awsome! My goal is to reuse as much of the original 50 year stuff as possible – and not blow the bank. I want to rebuild but also maintain a certain level of used look, sort of the rat-rod look. I fished the boat hard for 10 years, don’t want to feel guilty messing it up. Just want it to run and be safe. It’s not for sale, stays in the family.


11: Full RPS Mock-Up with Console
Having fun now. RPS is coming along. Got some rough wood in there as a template to get the measurements and positioning correct. Looks good next to the console. Working out the plans for the cushion foam, etc… Local fabric center sells marine grade vinyl for ultra cheap per yard (same as the cushions in photo I’m doing the test layout with). Got to keep that budget in mind.
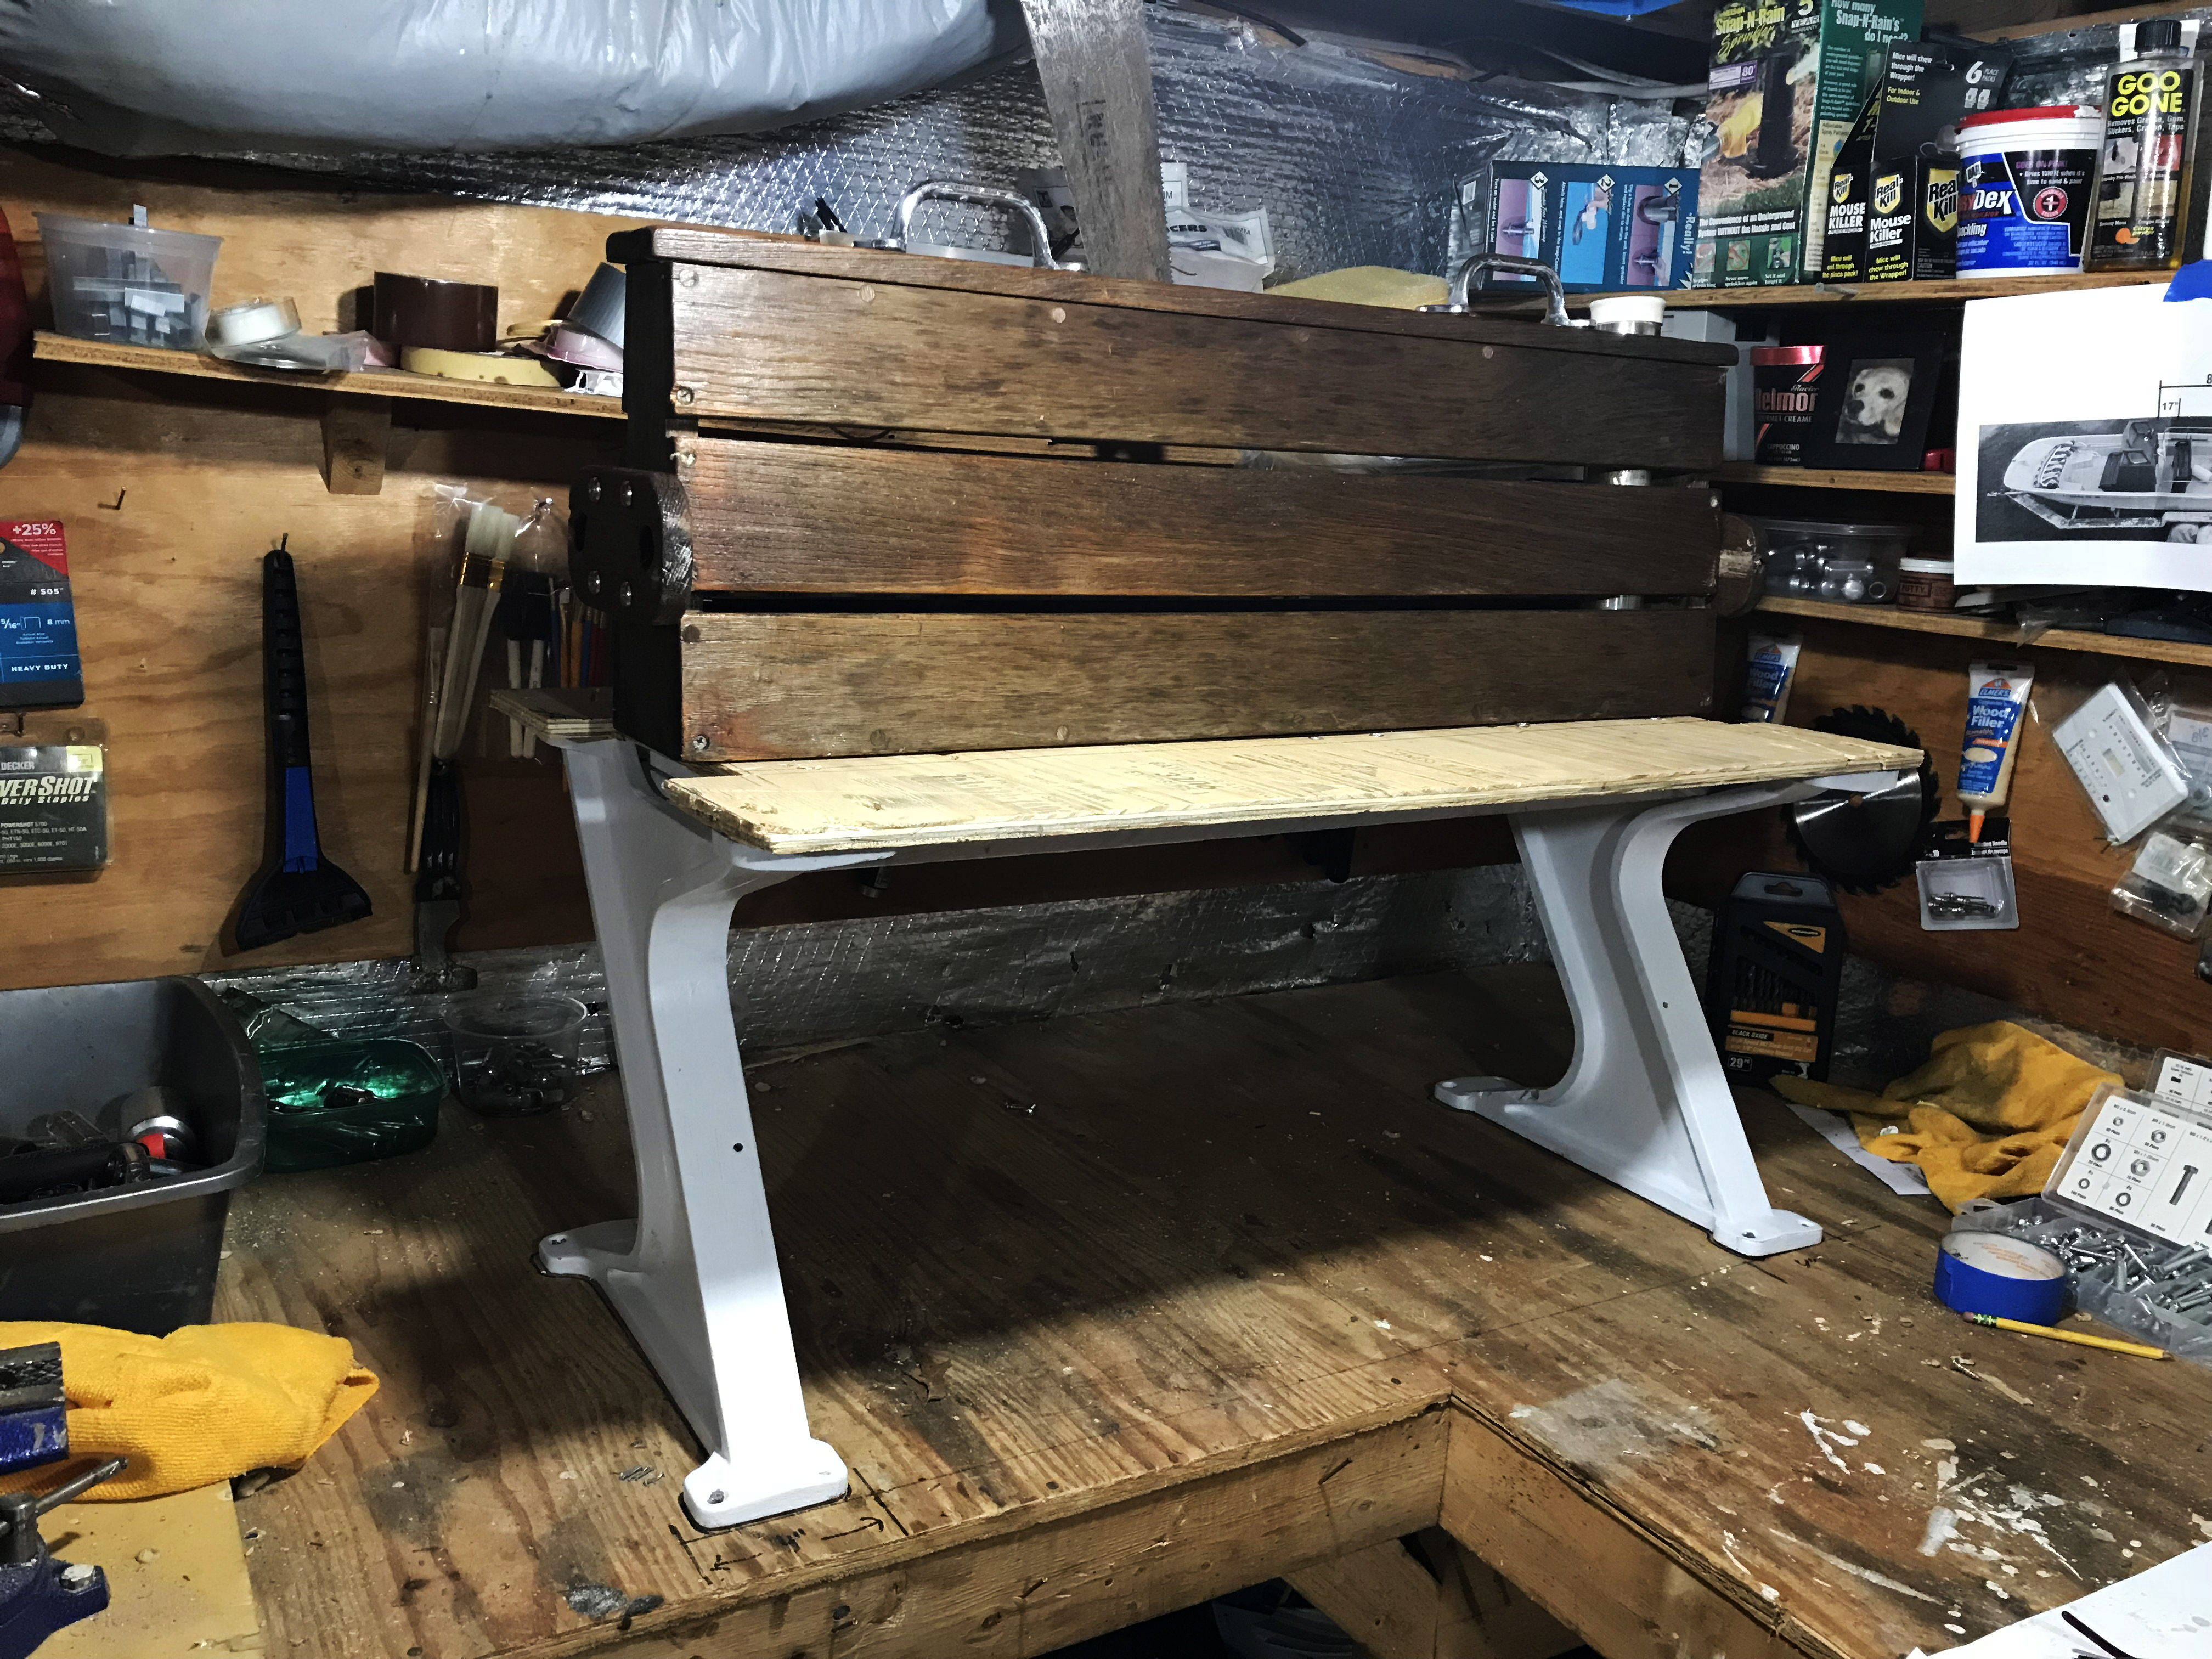
12: RPS Progress
Wood back and Z legs varnished and painted. Quick mock-up while I build the actual wood seat base and cushion.

13: Santa's Wish List
This job is going to be only as good as the prep and materials. Until now it’s been the basics – grinders, sanders, fairing epoxy, glass resin filler, glazing compound and plenty of elbow grease. Here’s a must have list of what will be purchased to get the job done… plenty of brands to choose from, I really like TotalBoat. My serial# tells me my Whaler was built between January and May 1968.
The Whaler wood locating diagrams I have downloaded show a huge upgrade in wood support placed under the deck after May 28, 1968. My boat, based off the December 1962 diagram, has literally three narrow pieces of plywood running the length of the deck to screw the console, RPS, etc… to. The May 28, 1968 diagram shows multiple additional pieces of plywood located under the deck for support… crazy
• TotalBoat Primer (gray)
• TotalBoat Topside Paint (classic whaler blue for interior)
• TotalBoat Topside Paint (white for hull above water line)
• TotalBoat Total Protect Epoxy Barrier Coat (gray for hull below water line) – want to prevent any further water migration into hull
• TotalBoat Bottom Paint (blue for hull below water line)
• TotalBoat Brushing Thinner
• AeroMarine 4# Density polyurethane foam (probably two – 2 gallon kits, still doing the math)
Research tells me that Whaler used 2# foam back in 1968. The unique high pressure foaming process they used to sandwich the deck and hull together morphed the 2# foam into the structural density of 4# foam. For me, 6# or 8# foam would be structurally stiffer but would add too much weight and might not have the flex needed. I’ll stick with 4# and may add a few stringers to compensate… need to research a bit more.
• 17oz Biaxial Fiberglass Cloth (for entire deck, about 5 yards)
• West 105 Resin
• West 205 Hardner
Once foaming is done and contoured, deck gets glued back down with epoxy resin and maybe some glass strands (if there are any gaps). Resin will stick fine to new foam. Deck cuts will all get beveled down and layered filled with Glass Cloth. Then the whole deck gets reinforced with 17oz glass cloth, probably an inch or so up the bulkheads, then sanded, primed and 2 coats of topside. On second coat of paint I’ll mix in SoftSand non-skid to recreate the original non-skid areas that were glassed over and sanded down.
Acetone, brushes, rollers, masks, degreasers, gloves, etc… whatever is needed as needed.
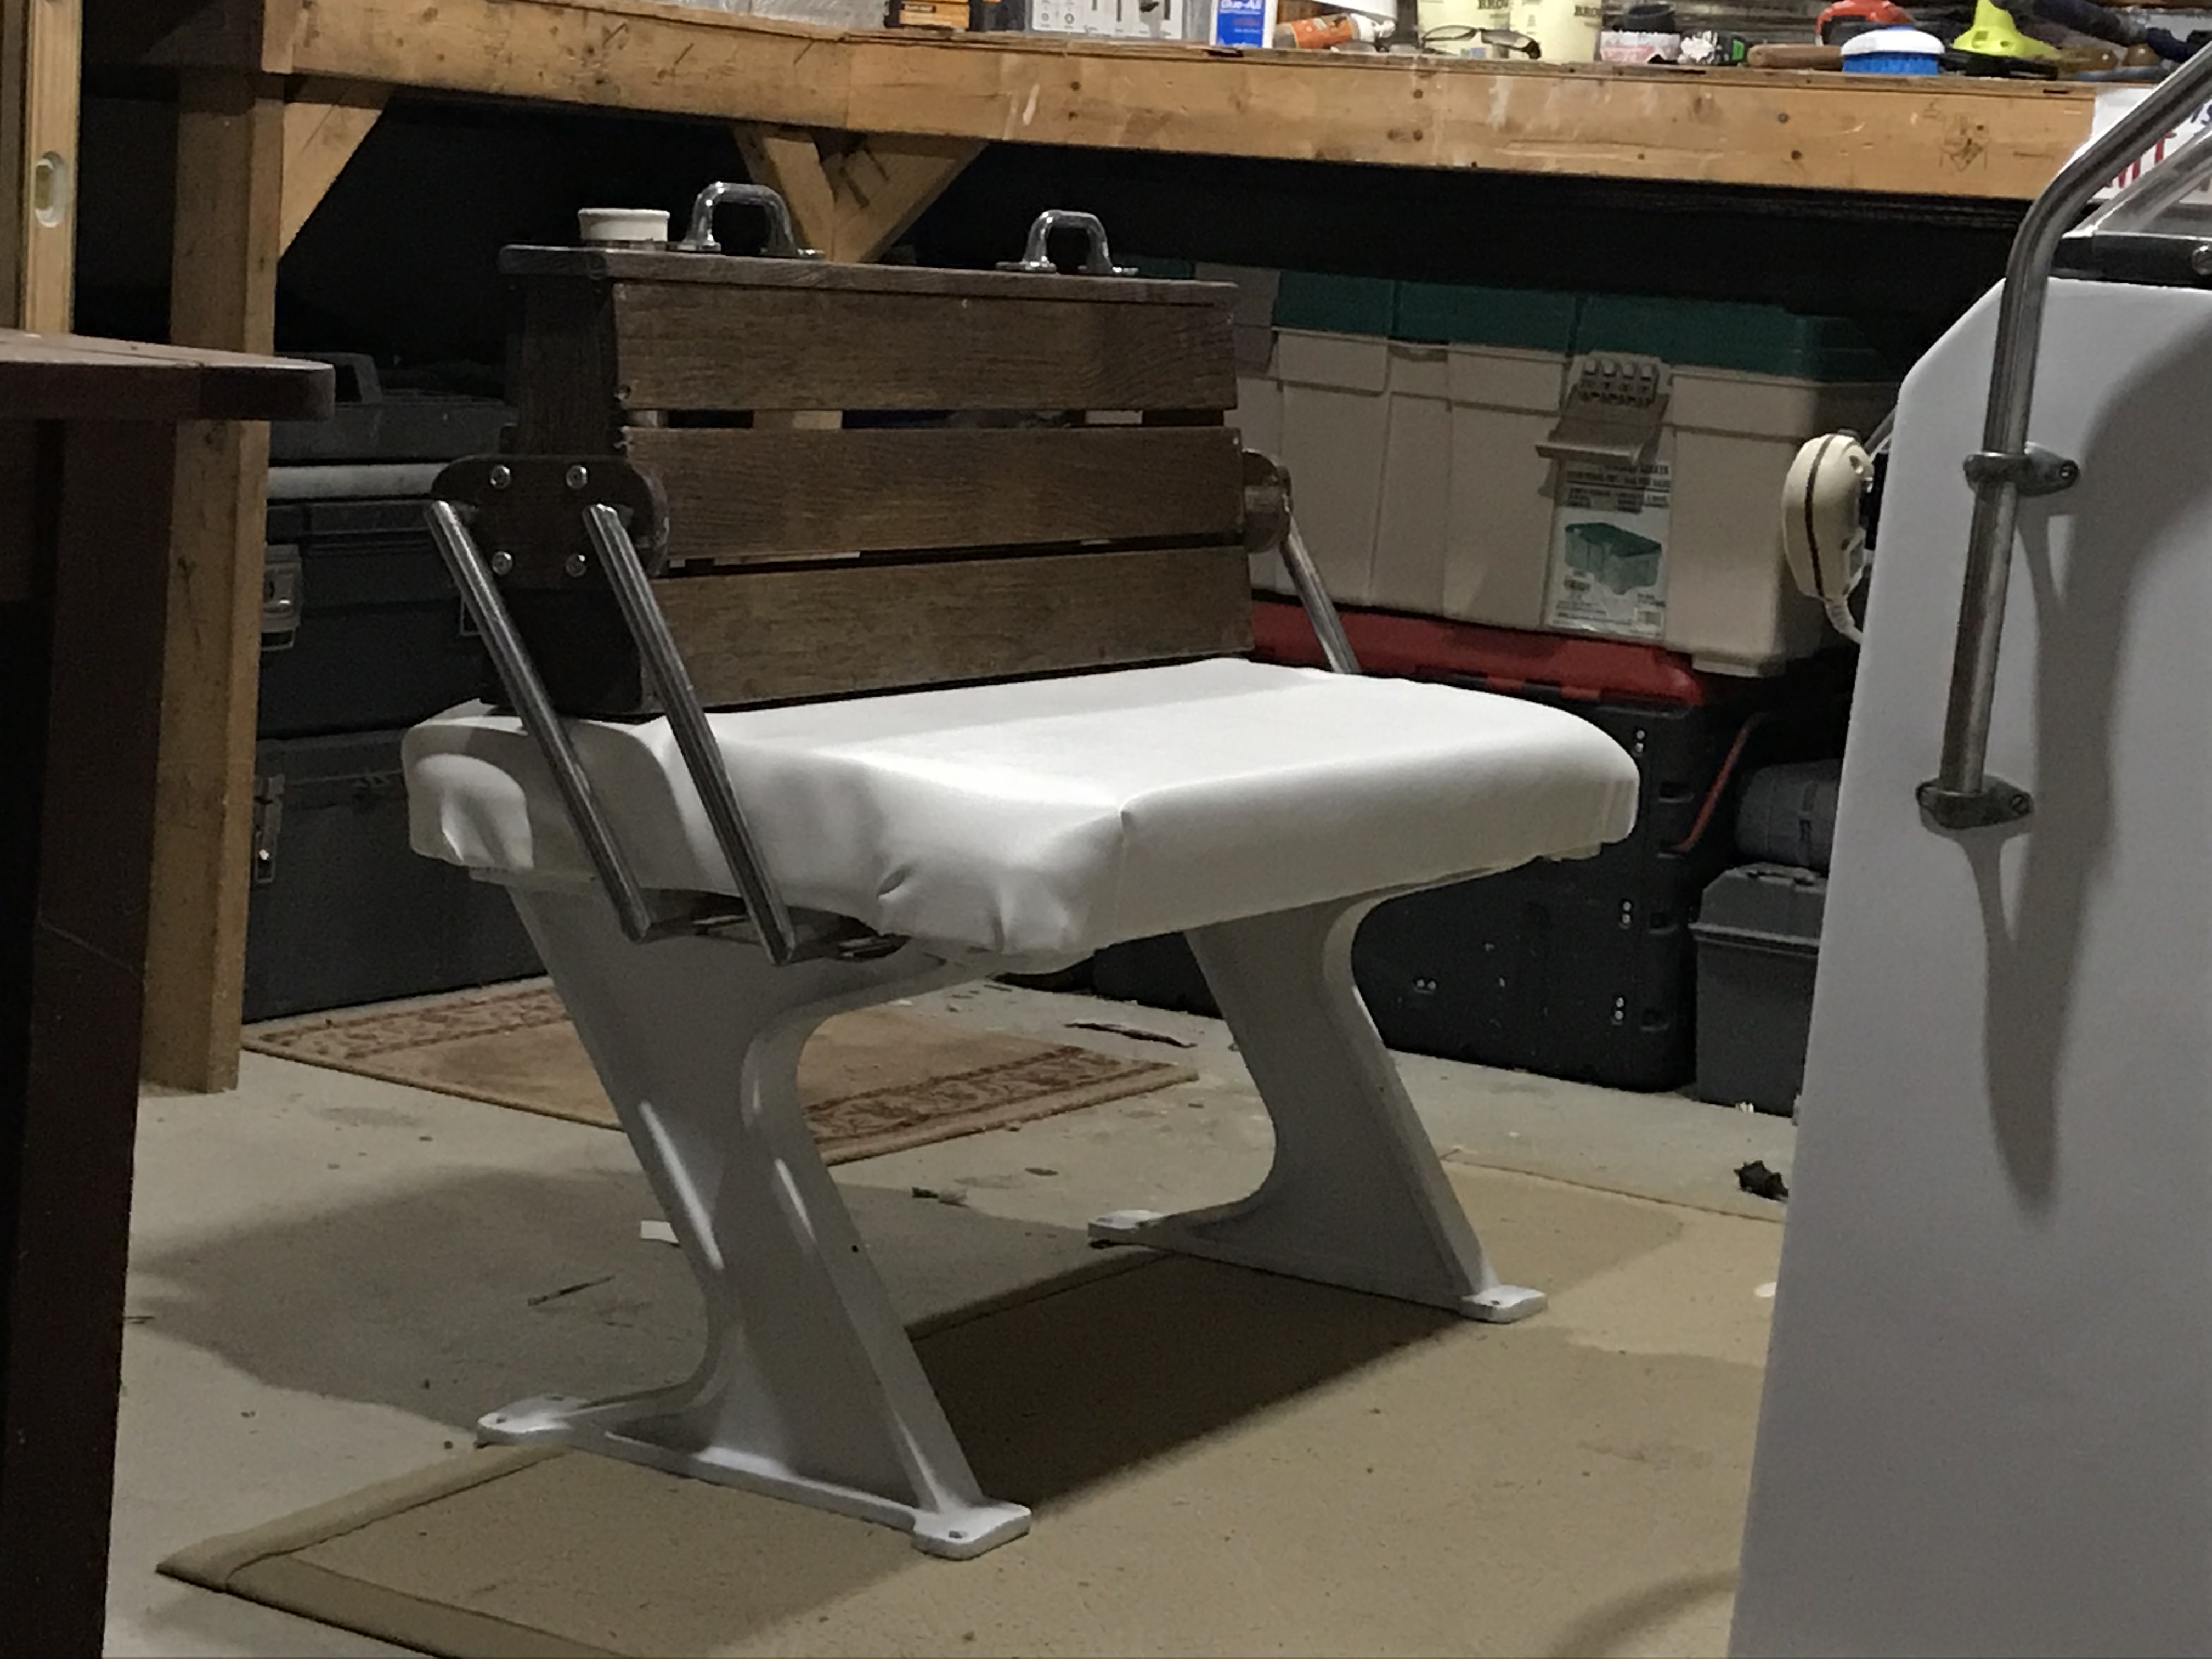
14: RPS Finished
Clearly cushion construction is not my strongest skill. The $ I paid for the foam and marine vinyl, I could easily build 4 more cushions for the cost of one RPS cushion online. Good enough for me. All stainless screws and marine plywood (extra from another project) for the base… it’s built to last. It’s not a $10K showroom classic, that was never the intention…back to filling and sanding.
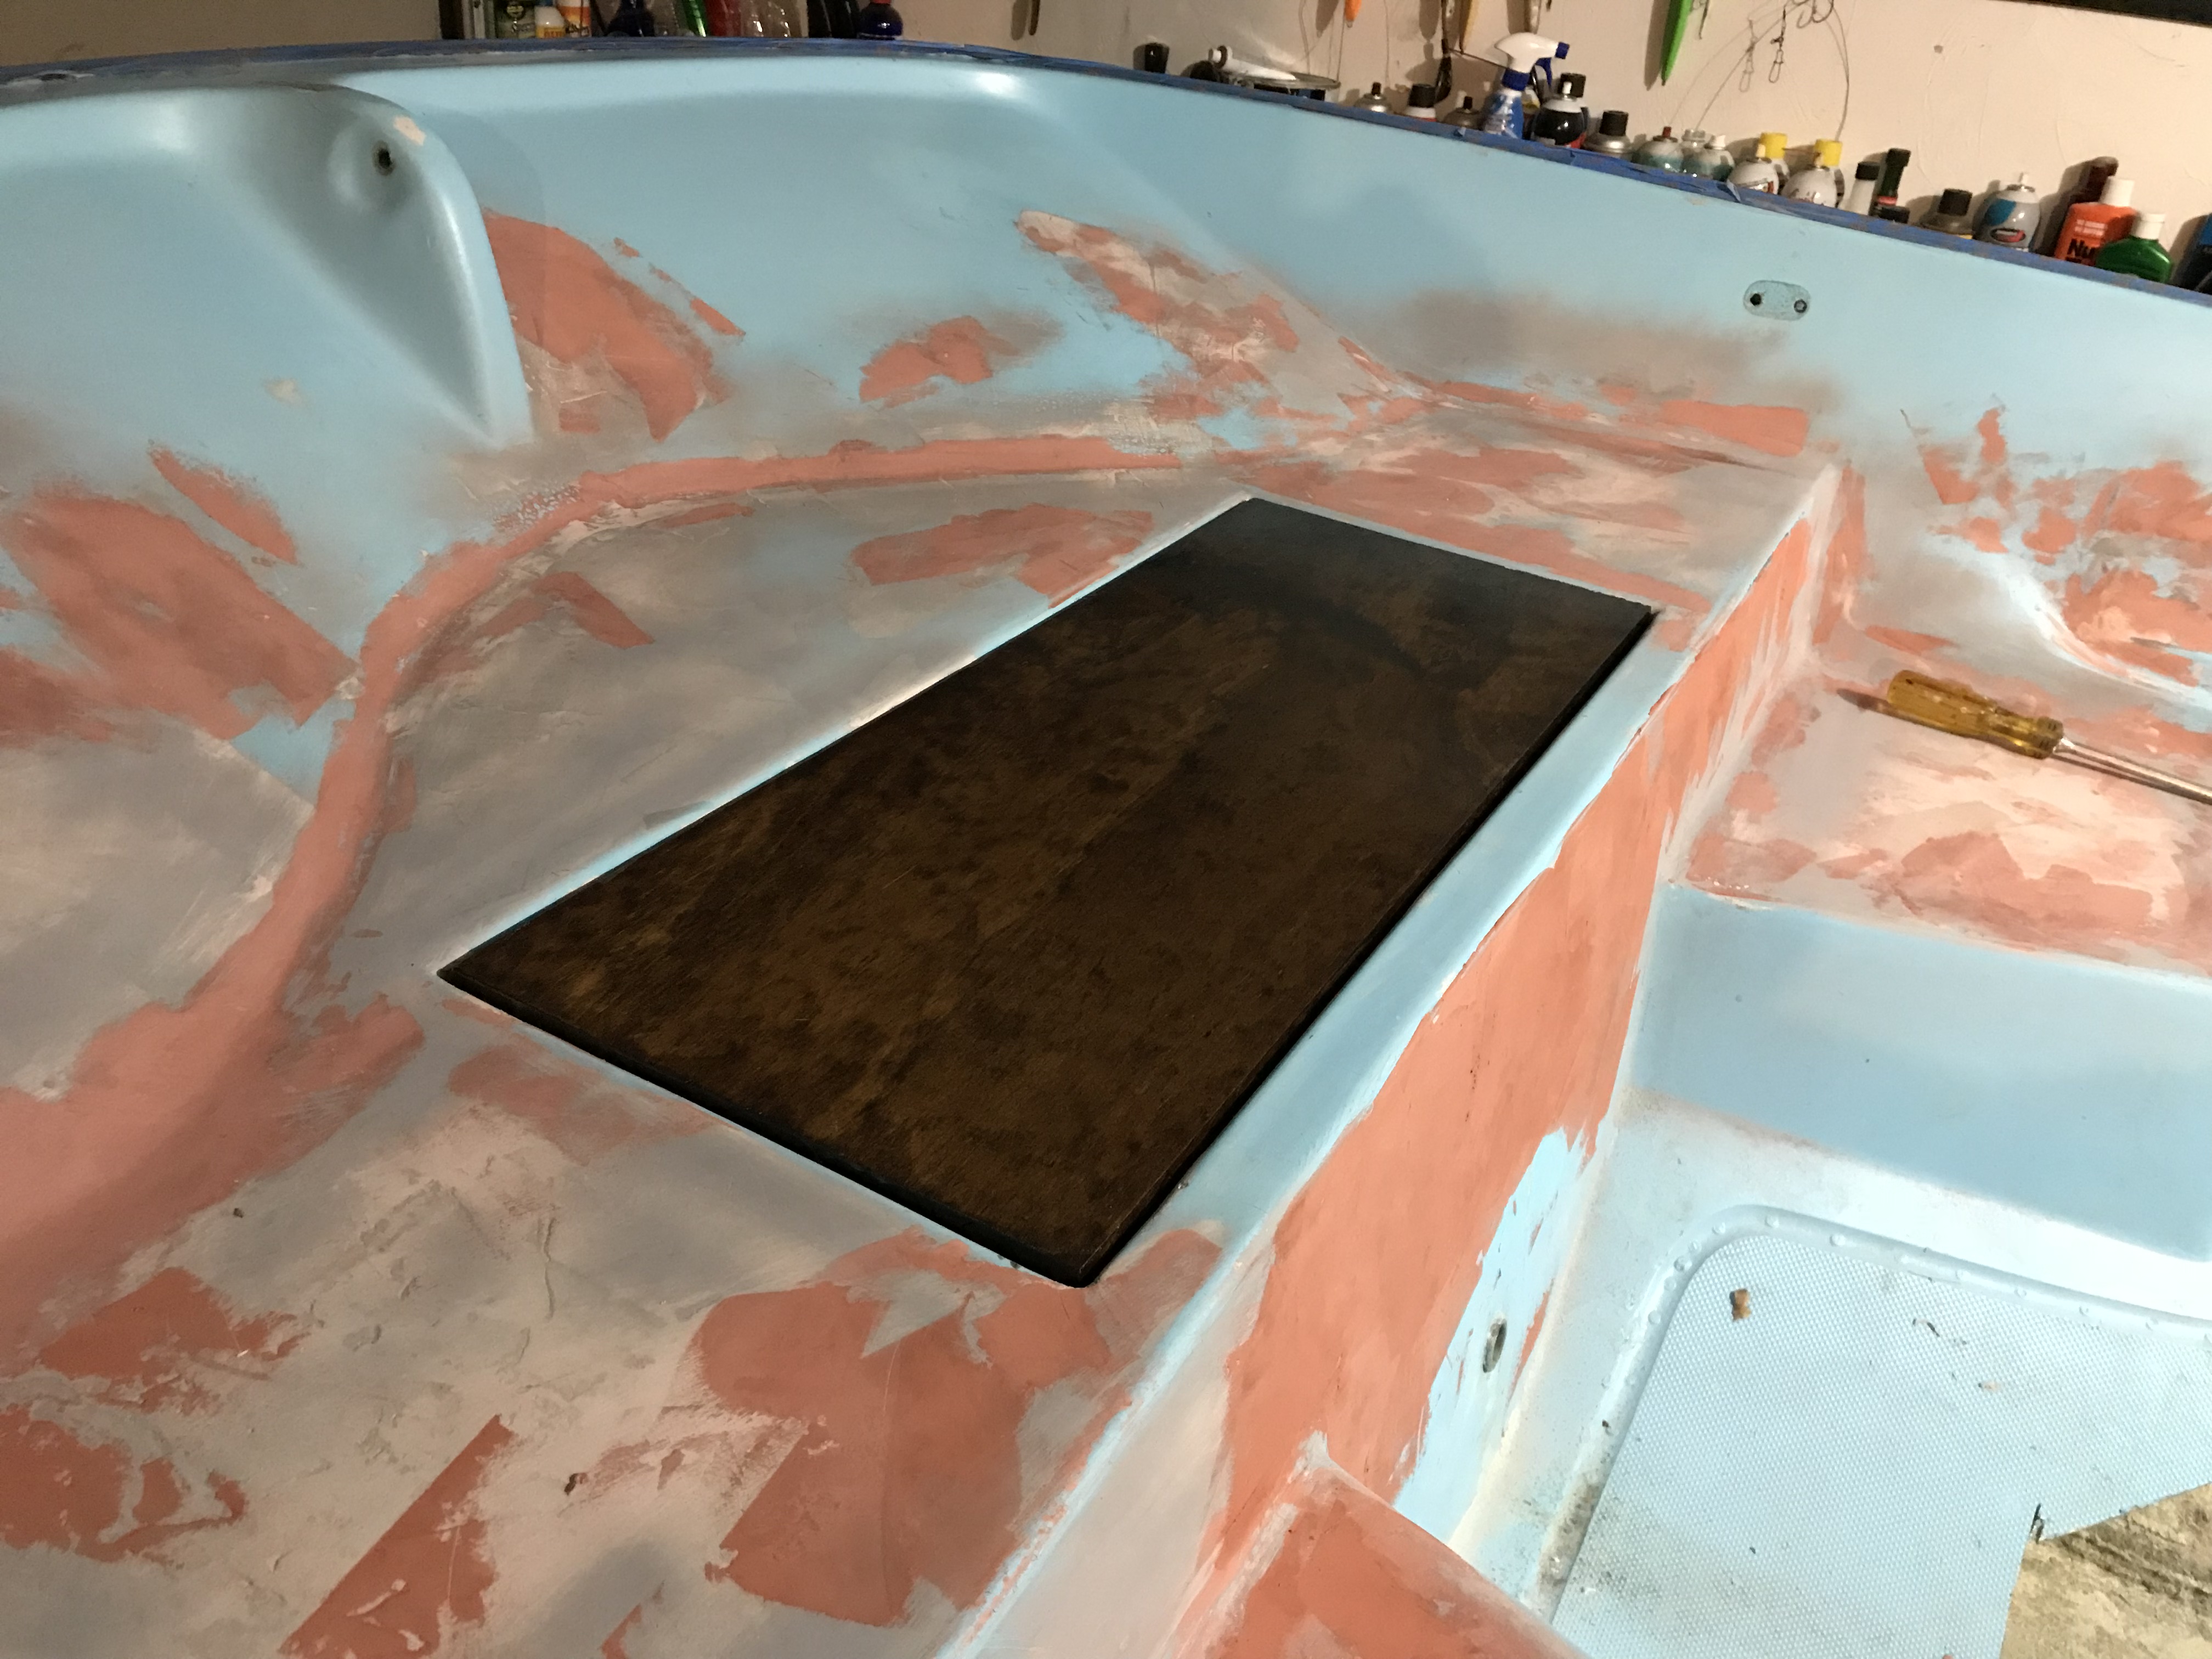
15: Got Wood?
Detoured from filling and sanding. Decided to do a little woodworking. Hatch finished. Multiple coats of Spar Varnish. Still pondering what sort of handle to install.
16: Got Wood, Part Deux
Rear Bench 95% complete. 1 inch hardwood, several coats of polyurethane, light sanding with 220 then three coats of Spar Varnish. Still need to add some additional structure underneath, it will also hide fuel/water separator and wiring. Adding another slat to front end… making it a bit deeper. Liking the wood accents from hatch cover, to RPS, to bench… just enough. Battery gets tucked under bench. There is also a bit of room to stow tackle box, spare 6 gallon gas tank, etc… Big plans for console… adding whaler styled rod holders (my version).
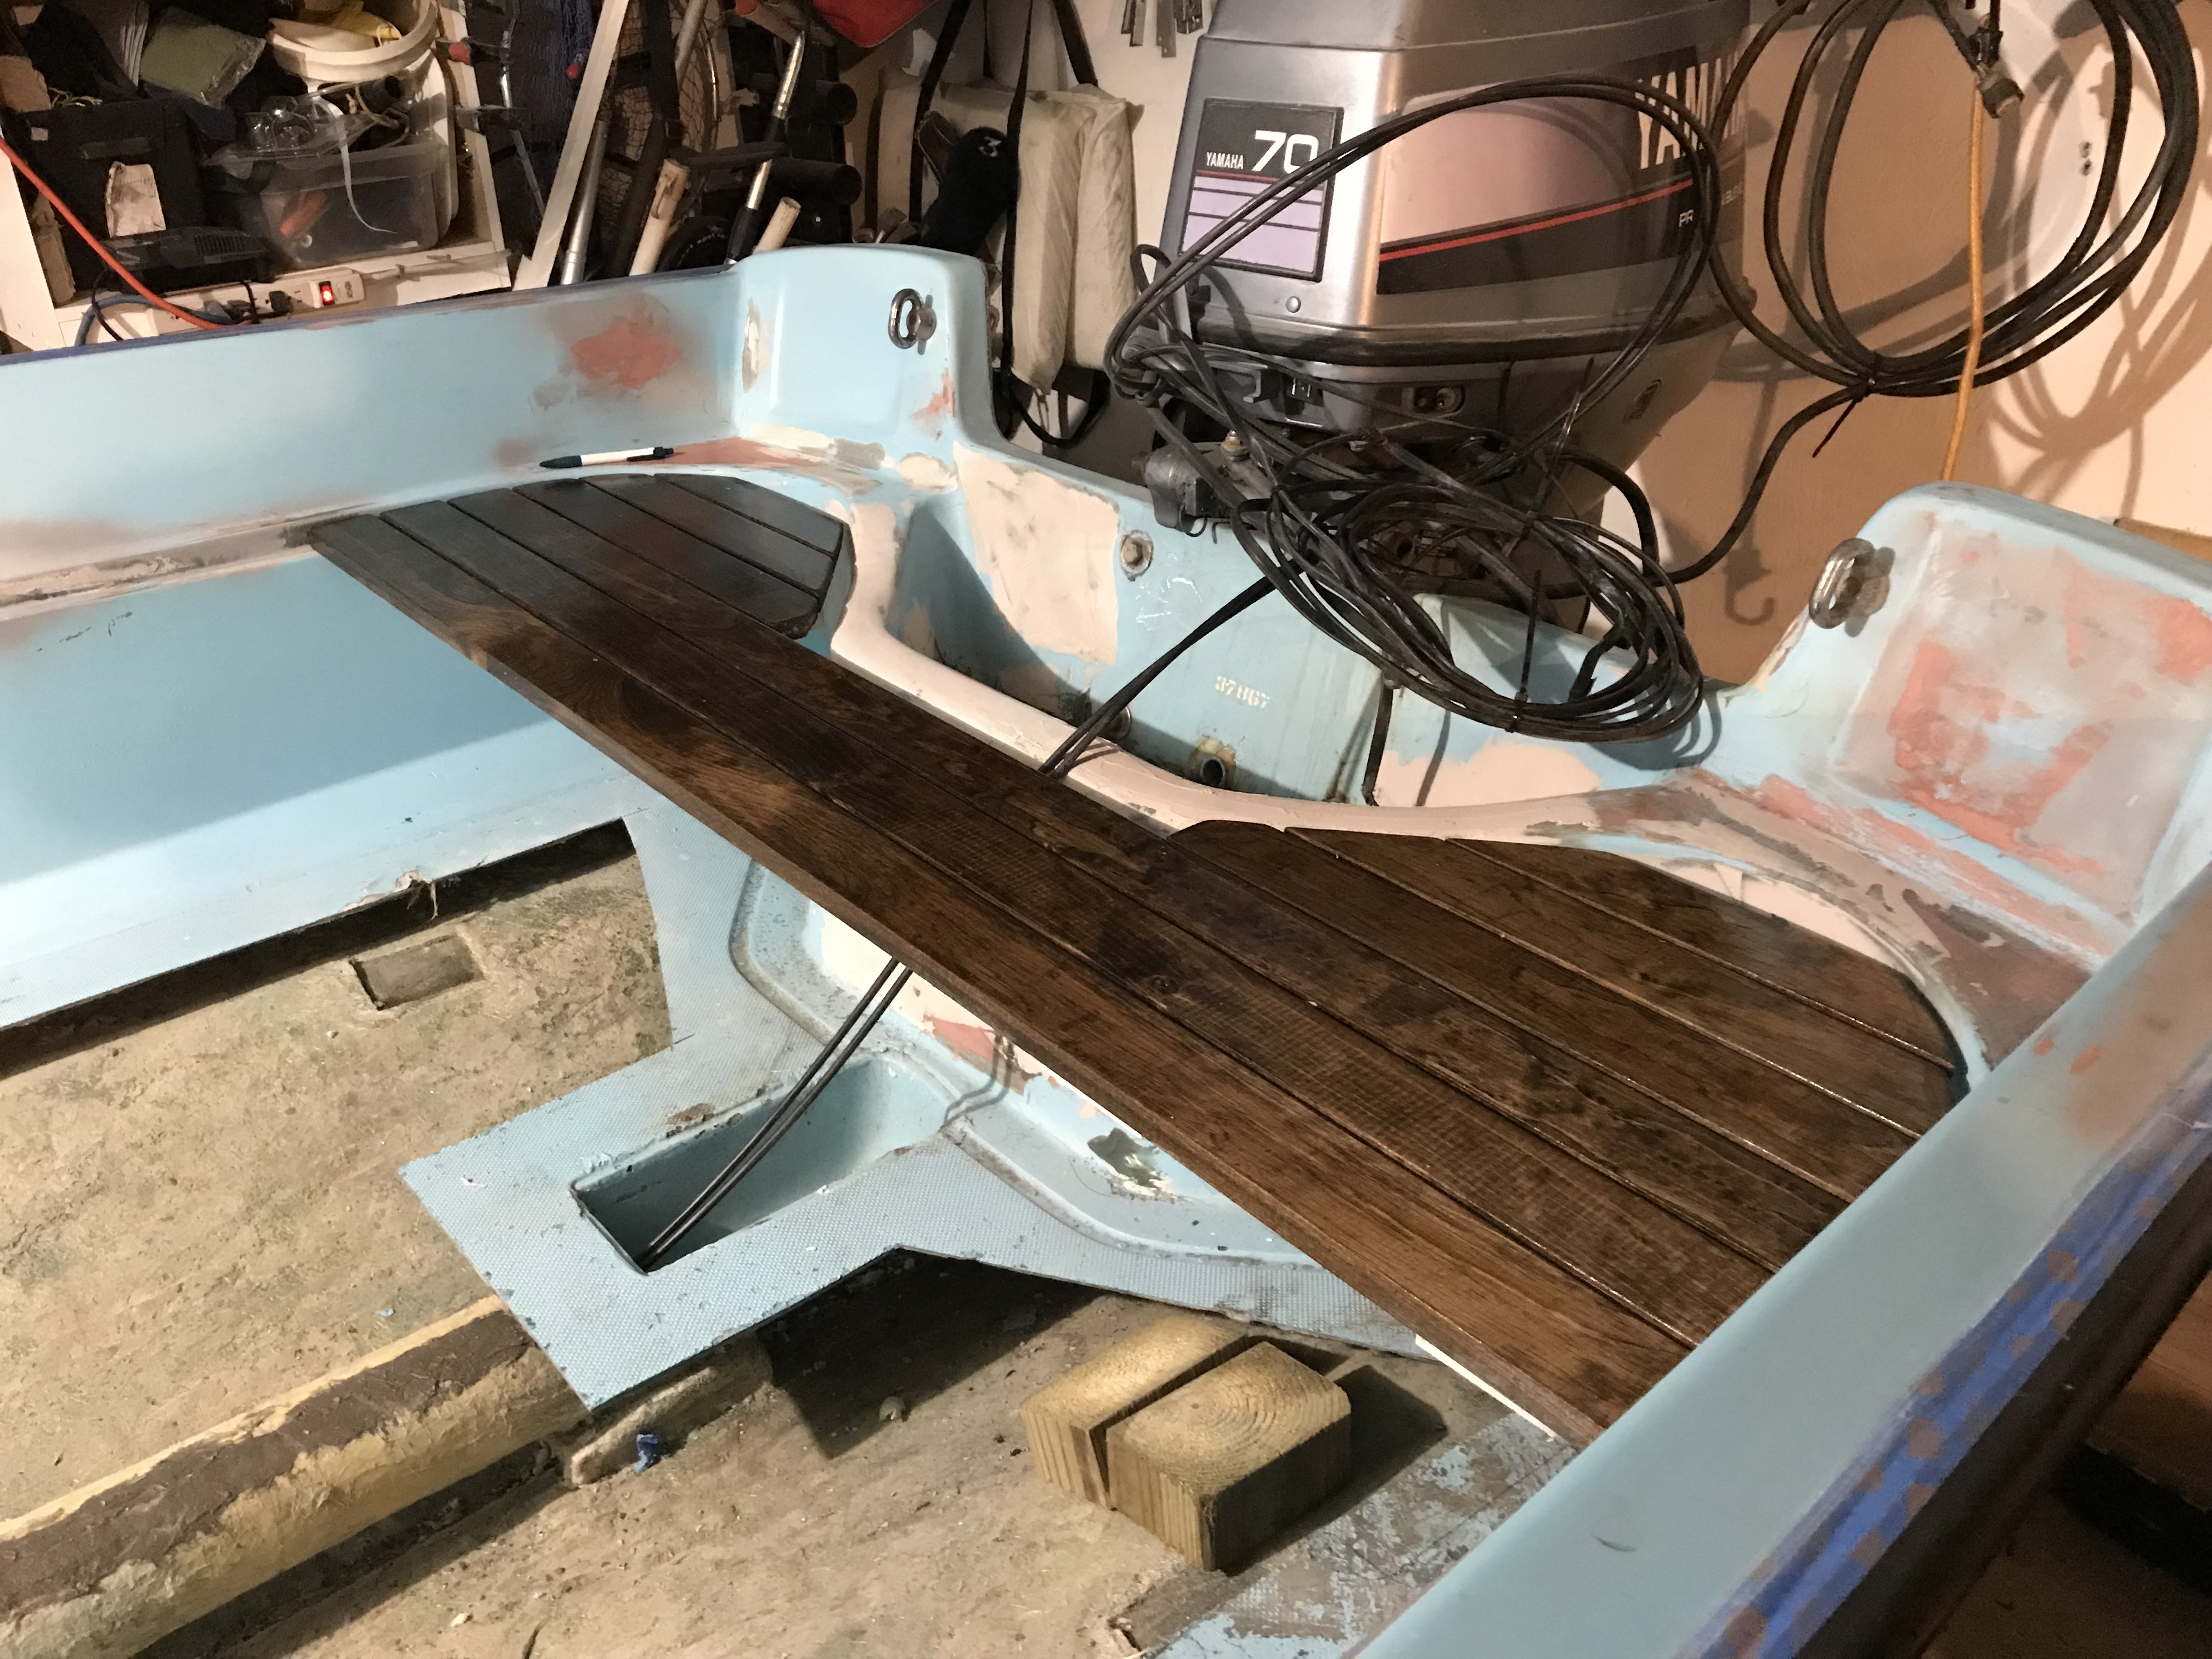

17: Rear Bench Finished
Added another slat and finished the fuel filter/wiring enclosure. Poly coats done, spar varnish the whole thing a bit later.
18: Console Rod Holders
Taken from original whaler diagrams and modified to fit my console. Next brainstorm is trying to create the snap on back cushions. See you in December.